‘Electrical’ Archive

Victorian Library Build Day Two August 20, 2011 1 Comment

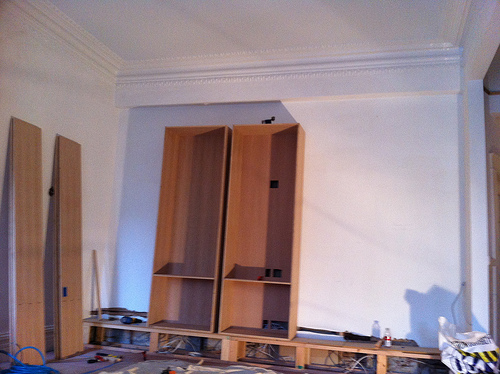
Two Bookcases Complete

As day two comes to a close we have made a great deal of progress. As you can see from the photo above we have two bookcases fully assembled. The rest of the pieces are waiting for assembly tomorrow morning.

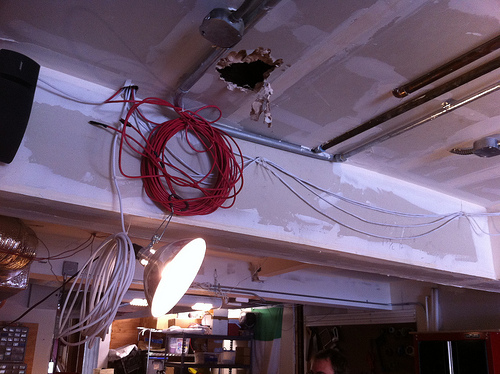
We also finished all the electrical and home theater wiring. Now is the time to plan ahead and make sure you have everything you need because once this is all sealed up its very hard to access. Luckily for us, this isn’t the first time we’ve wired a theater. We leave ‘chases’ for ourselves so we can fish more wires in and out as technology changes. We also ran two CAT6 cables in, just as we do for each room we work on.

Home Theater Wiring

For more photos visit the Victorian Library photo set on Flickr.

Accent Lighting for Artwork March 25, 2010 1 Comment

Halogen MR-16 eyeball lights on Weston Flax

This was one of the simplest projects we have tackled and made a pretty dramatic impact on the room. The room is much brighter and has a whole new sense of completeness that it was lacking before. Great bang for the buck. Also, since we had already updated most the electrical in the ceiling this project was complete in less than an hour.

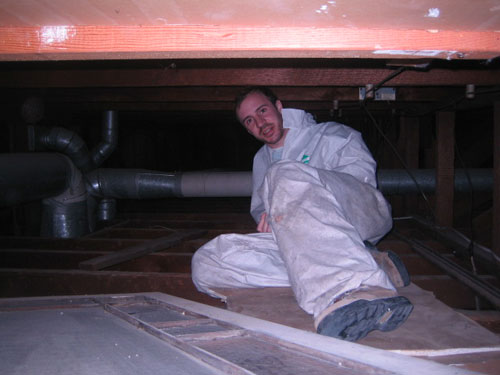
We started from inside the room and marked exactly where we wanted the lights to go. It helps to have a second set of hands to measure everything up perfect and square. Then after the positions were marked I put on the Tyvek suit and climbed up into the ceiling (thats what happens when you are the skinny one). From there Brian would use a RotoZip to cut out the holes and I would feed him the power. Then the lights are fed up from inside the room and snapped into place. Its that easy!


Thats me climbing in the ceiling

Replacing an Old Chandelier January 21, 2010 No Comments

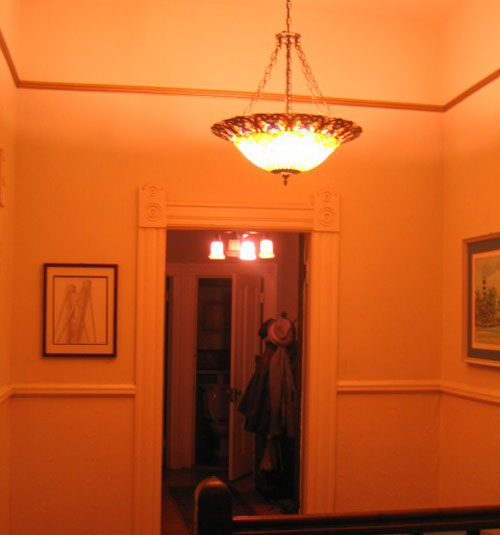
Although the chandelier we replaced may be more original, as in old and added in the early 20th century, this period Tiffany chandelier also fits the style of the house and is more appropriate for the living of today. We picked this one up for a few hundred dollars from Lamps Plus. It gives off a much yellower light, even with CFLs, and hangs high and in the center of the room with a medallion that we added. Hopefully someone on eBay will find use for it. You can see more pictures of the old one and the new one here.

This, like any other project involving wiring in an old house, requires taking power from a modern circuit to alleviate the stress on the old knob and tube. Luckily, I am no stranger to climbing in the crawl space and already have pulled a new circuit. All of that went fairly easily as usual. Hanging the chandelier took a little longer however. This is the first time we have hung one where one didnt exist before, from installing the box in the ceiling with wiring, putting in a ceiling medallion, and hanging it.

All in all, its an easy project and following directions helps as always. We ran into trouble because we added a ceiling medallion that made the threaded rod that came with the chandelier too short. Luckily, when we pulled the old chandelier off the ceiling we found one that fit our needs. Even so we still tackled it in a few hours.

For pictures check out flickr.

Rewiring This Old House Continues September 28, 2009 No Comments

Many of the joys of owning or even maintaining a home are fixing the little things; the things that don’t work quite right. The things that no one can really see but you. Wiring definitely falls into that category. In my house, I have three fuse boxes. Two of them are decades old when the house was still two units and the other one is a sub panel for the kitchen remodel.

Like other projects in the house when I know better than to tackle it myself I call in a specialist. In this case a licensed and insured electrician, Tim Moran. Some of you who read this blog know that I do a lot of my own electrical wiring, almost all of it actually. But when it comes to installing a new fuse panel and redoing some of the horrendous wiring its best to leave it to a licensed professional.

While Tim and his apprentice were in the basement replacing my old fuse boxes with a modern one I was doing some rewiring of my own. About the time that our seismic work was done my phones stopped working. Turns out it wasn’t a coincidence.

After a few hours of work on both of our parts the wiring was done and everything was back to normal. Now instead of three fuse panels there was one and all the wiring and conduit was cleaned up. Also, I fixed all the phones and ripped out all of the dead wires and hid everything that could be hidden. Not bad for a thousand bucks and a few hours of my time.

For those of you who are interested in working on telephones its quite simple actually. With the digital lines of today, the signal is carried over only two wires, usually red and green. Also, there’s only a maximum voltage of 30 volts and the current is low so it wont shock you. The only tool you will need is a lineman’s handset, also known as a butt set. They are often orange and look like a telephone handset with two wires that have alligator clips at each end. They are cheap and easy to find on the Internet or you could easily make one. Anyway, connect the alligator clips to a binding post or a wires in question and start looking for a dial tone. Now its just a matter of digging through that gaggle of wires and figuring out where they all go.

Install a Flat Panel TV with Hidden Wiring March 4, 2009 5 Comments

We all love the look of a nice sleek flat panel TV on the wall but no one likes the look of the wires just dangling there. Hiding them is actually quite simple it just takes a little thought a few tools. My job was little more complicated because I had to figure out how to keep them away from the chimney but the principal is the same anywhere. This is a great thing to try on your own as its a pretty simple job. Worse comes to worse, you pay someone to finish the job if you cant complete it yourself.

Really all you have to do is make holes around the studs so that you can pass wires over them. If your walls are lath and plaster like mine its a little hard to use an electronic stud finder but its still possible. I just knock and listen like the old timers do. Once I find the studs, I knock out rectangles over them so I can run my wiring there. I also like to notch out the studs and then put nail guards over them so a future owner wont put a picture frame nail through them. You could also drill through the studs but HDMI cable heads are kinda big, as well as all the other wires you gotta pass through there.
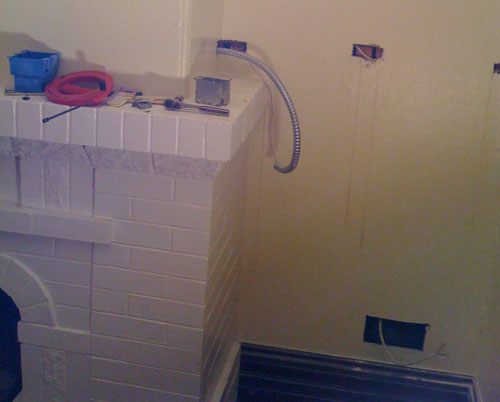
Make sure that you properly pin down the wires so that they dont get yanked out accidentally. You can use a nail guard like I did or staples. Just be sure not to crimp the wires! I would hate to have to do that twice. Now that the hard part is done, its time to get out the plaster and close up the holes that you made.

I also went the extra step and ran power to the TV so that I could use my power conditioner. I highly recommend using a nice conditioner like a Furman or Panamax to protect your equipment. Being paranoid and not liking to do things twice, I ran this power separately from the other video cables so as not introduce any interference. Again, I hate doing things twice.

Behind the TV I installed a two-gang junction box and a special flat panel TV box that is recessed to give you more room. I picked both of these things up at the Home Depot for a few dollars. Be sure to check out the back of your TV and decide where the box should go. Some places have more room than others and every TV is made differently.

Now if you want to get really fancy like I did, I installed nice wall plates behind my stereo setup for a professional finished look. You can easily just dangle them out from behind the drywall but who wants to do that? If you’ve come this far you may as well go the whole way.
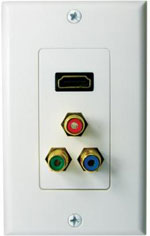
I picked up wall plates for my component video, HDMI, and speaker cable from hififorless.com, one of my favorite cheap equipment suppliers. They didnt cost much and the installation is self explanatory. When it said it done, it looks quite nice. To the right is the component video and HDMI plate I installed from SCP Wire company.

All in all, this is pretty simple task that the average do-it-yourselfer can handle. As I said before, its a great one to try for your first time as its simple to repair if you make a mistake. I would hate to throw away a few hundreds dollars when this job can easily be tackled. A flat panel TV costs enough, save your money!

For more picture visit this flickr set.
Replacing Old Knob and Tube Wiring February 23, 2009 3 Comments

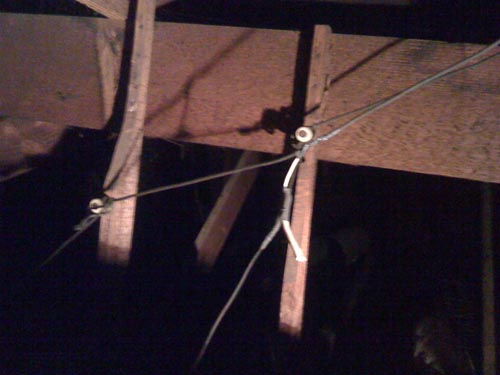
Horrible splice job in some old knob and tube wiring

If your house is over 50 years old like mine is, chances are you have knob and tube wiring somewhere. Although its pretty cool to look at it and a marvel of its time, its outdated, annoying to work with, and most importantly ungrounded. Many electricians will tell you to leave it and I would agree; however, my home automation needs updated wiring to work. So, we began the daunting task of deprecating old wiring on a case by case basis.

Luckily, I have crawlspace access above the second story which is our main living space. That being said, its tight an cramped, not too mention 12 feet up through a skylight. Not the easiest thing to get into. When I got up there though, I was surprised at the cleanliness of it all. No animal remains at all and everything appeared to be in good order, except for the wiring! Yikes! It had been hacked and spliced over the years to the point where some of it was unsafe. As you can see from the picture above, I found new romex wiring spliced into knob and tube wiring that was abandoned. So I began the process of cutting out the old wiring and replacing it with the new. We still have some left but I like to think its a little safer now.

Wiring is actually quite simple and there’s really not much to know. The trick is, check your work and try to minimize the damage you make existing walls. Lets take the picture you see below as an example:

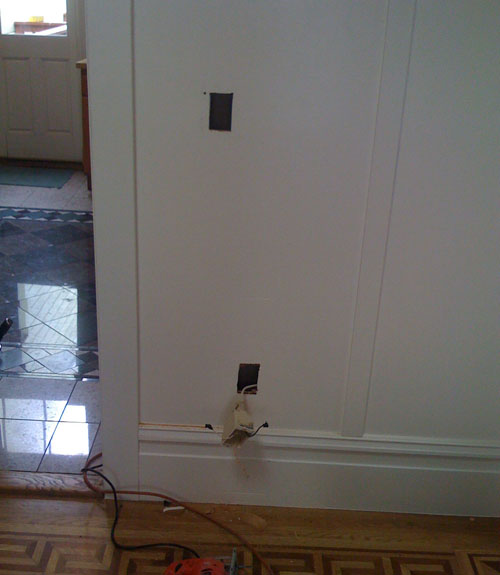
For some reason, the dining room had no chandelier. Luckily, I had clean grounded power in an outlet by the door from when the kitchen was redone. So, I made a hole in the plywood above the outlet for the new light switch. I was going to simply run a wire from the outlet to the switch into the ceiling but of course, this being an old house, there was crossblocking everywhere. Normally I would just find the block and open up a hole there to pass the wire through but this was all finished wood, not plaster. Instead, I opted to go through the kitchen and make holes there up to the ceiling rather than ruin all the finished work.

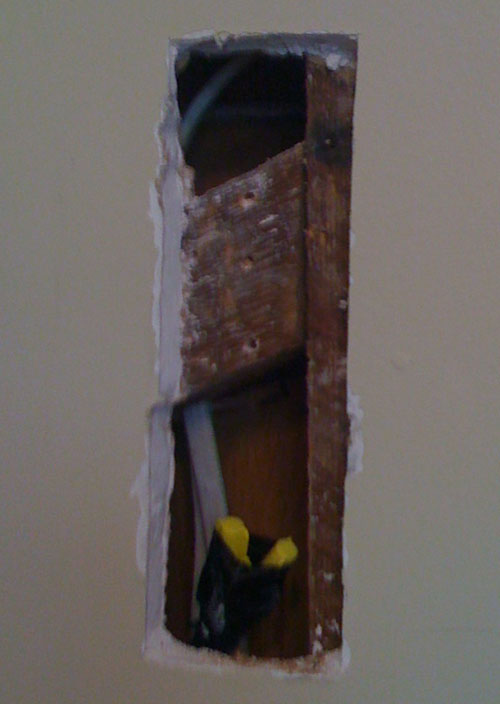
In the picture below you can see how I ran the new wiring through the blocking. I made the hole slightly larger than it had to be for a number of reasons. The first is to get a long bit in there to drill through the blocking. You can also chisel out a piece of the blocking and run the wire through that but just be sure to cover it with a nail guard so someone doesn’t try and put a picture hanger through it at a later date. The second reason for the bigger hole is so that I have something to support the new piece of drywall that I will have to put in there.

More photos can be found here.