‘General’ Archive

Custom Double Hung Window Replacement July 19, 2012 12 Comments

If your home is anywhere near as old as mine you know that windows are the biggest factor in energy loss. In the summer they let in heat and too much UV light and in the winter they let out heat and in cold air. The easiest way to remedy the problem is to have custom windows and sashes made from someone like Marvin, Anderson, or Pella which means the old weights are being removed as well as the old sash. This isn’t very traditional and does change the look drastically on both the inside and the outside of the house.

Instead of changing the look I found another custom solution that blended the best of both worlds. The Wood Window Warehouse in Emeryville, CA specializes in making old style windows with modern technology. They use traditional joinery and old style methods of creating double hung weighted windows with two panes of gas filled with gas with a low-e coating to keep out UV light. They also add weather stripping all around for nice tight fit.

Below is a photo of the windows removed.

Old double hung windows removed

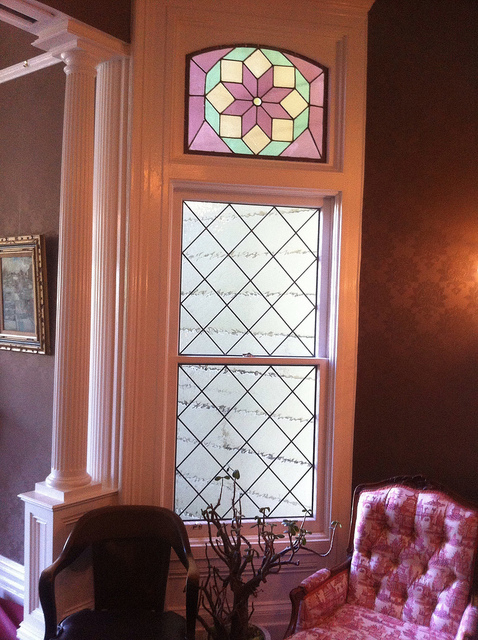
Below you can see a close up of one of the new windows. We attached our original hardware and you can barely tell the difference. The craftsmanship is superb and the room is already feeling less drafty. It is also protecting our beautiful damask wallpaper from fading.

New Double Hung Windows Installed

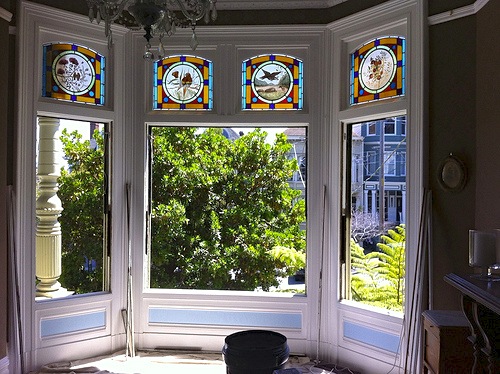
While we were having the windows replaced in the front parlor we also decided to have a leaded glass window made for the library. The view out the window looks down the tradesmen entrance so translucent glass was a perfect choice to mask the ugly view. The leaded glass also plays nicely on the original leaded stained glass above and helps to complete this part of the library.

Leaded Double Hung Window Replacement

All in all the project was as easy as picking up the phone and ordering. Unfortunately these windows don’t come cheap but its the price you have to pay to keep the house traditional.
Victorian Library Begins August 10, 2011 5 Comments

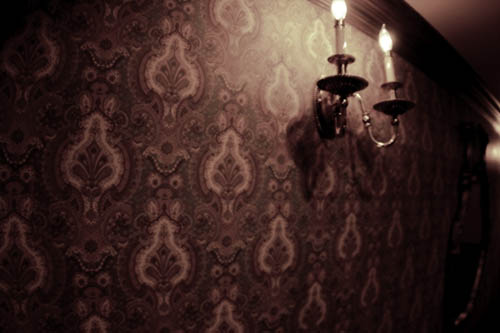
Victorian Wallpaper(photo courtesy of Johnny Cupcakes)

After many years of planning and other projects to complete first, we have finally gotten around to my dream of creating a traditional victorian library. When complete, the walls will be wrapped in velvet, drenched in dark leathers and woods, and topped off with an oak wall-to-tall bookcase with a sliding ladder. There will be a globe in the corner that is actually a bar, tufted leather chairs that would be suitable for Gatsby himself, and a record player powered with glass tube amps.
On Saturday August 20th we will finally be starting the build.

My Father, roommate Brian, and I will be building for about 5 days and I will be tweeting the entire process of the bookcase build with photos. If you want to watch it unfold live, follow me at @johnclarkemills where I will be tweeting photos. I will also be updating this blog daily with new photos and a quick writeup.


About the Library

Just like the staircase we built two summers ago, the Library will also be built of red oak. The bookcases themselves will be eleven feet tall from wall-to-wall with a matching red oak sliding ladder on a brass railing. The vertical pilasters between the casings will be 3 1/2″ wide fluted red oak columns. The decorative head piece on top is almost a foot tall and covered in dental moldings. Once the wood arrives I will be sure to add photos.

Wood Parts List

9 – 4×8 sheets of A1 quarter-sawn red oak 3/4″ thick
5 – 4×8 sheets of A1 quarter-sawn red oak 1/4″ thick
6 – 8′ fluted pilasters (SF Victoriana ID: 40-8)
2 – 9′ fluted pilasters (SF Victoriana ID: 40-8)
1 – 15′ dental head piece (SF Victoriana ID: 7-61DC w/ dental)
10 – 8′ trim (SF Victoriana ID: 1-42)
12 – 8′ trim for shelves (SF Victoriana ID: 2-4)
1 – 15′ oak baseboard (SF Victoriana ID: 20-40
6 – oak medallions (SF Victoriana ID: 18-10)
2 – 15′ 3/4″ thick x 8″ wide solid oak plank
1 – Ladder from Putnam Ladders

Opening up the room

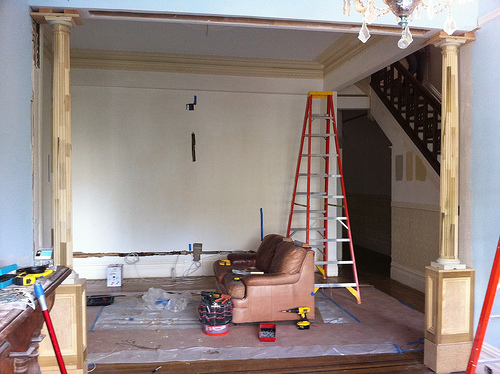
In preparation for the Library, we had to open up the two rooms to create a double parlor. We want the library to be very masculine and dark but not cramped so the wall had to come down. Below you can see the wall removed and two columns installed in between the rooms to add some definition to the spaces. They will soon be painted white like the rest of the trim in the house.

looking in towards the future victorian library

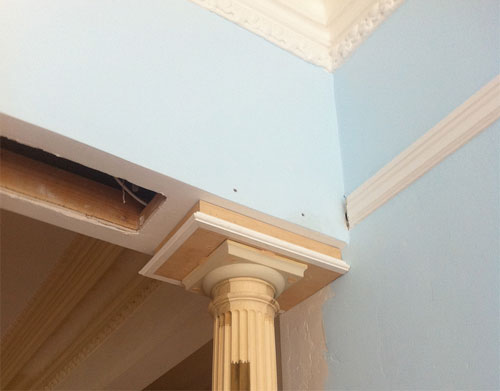
Below is a closeup of one of the column caps being finished up. The columns we bought online from Pacific Columns.

Victorian Column Top

Although these two rooms will be very traditional, we decided to add a modern amenity as it didn’t interfere with the aesthetics. When we knocked down the dividing wall we also added a soffit and stuffed a projection screen inside. Watch the video below to see it in action.

Once the entire screen project is done I will document more of the process, but for now you can see more photos in the victorian library Flickr set. Thats it for now. Follow me on twitter to watch the process unfold next weekend!

Victorian Staircase Restored September 18, 2009 16 Comments

Victorian staircase restored

After 5 days of working straight for ten hours and a lot of follow up work including stain, multiple coats of varnish, and paint we are finally finished. I think it turned out wonderful and couldn’t be happier about the results. It was a great learning experience and not all that complicated as long as you have patience and some good do-it-yourself experience. The pride of building something like this yourself and saving thousands on highly skilled labor is enough to make me want to do it again someday.

Before and After

Victorian staircase before and after

Before we had a huge dividing wall separating the downstairs living space from the staircase. This made the entry feel small and blocked the light from traveling further back into the first story of the house. Now we have this grand Victorian entrance with a matching banister throughout the house that hopefully pays homage to what this place looked like 119 years ago.

All of the pictures can be found on the Victorian Staircase Restoration Flickr Set.
There are many more posts where this came from. Here is a list of the all the posts in chronological order in case you missed any:

Staircase Build Completed Day Five August 9, 2009 1 Comment

As day five and the final day of the project comes to a close we have completed the build. All the moldings and trim are in. All the holes are filled. The entire staircase is sanded and its ready to be stained and painted. Its been a long five days, working about 10 to 12 hours each day. There’s still more ahead but it feels good to get the bulk completed.

I’d like to thank my dad for helping me to build my first staircase, Scott Bowles from SF Victoriana for recreating all of these components for us, and the Wood Works Company for creating our beautiful newel post. Without these folks the project would not have come together as well or as quickly as it did.

I’m off on vacation now but when I return I will stain and finalize the project, being sure to post pictures along the way. I have posted a few new pictures on my Flickr page as well for your enjoyment.

Follow up to Staircase Build Day Four

Staircase Build Day Four August 8, 2009 2 Comments

As day four comes to a close the staircase is complete. There is still a ton of finish work to do including setting nails, adding filler, finishing plaster, and course the final stain, but the staircase is done. All the new treads and risers are in, the railing and balusters are done, and all the final crosses are here. Besides my dad of course, I’d especially like to thank Scott Bowles at SF Victoriana for coming through in the last hour with the final pieces we needed.

I promise to update more as we progress on the finish work but now its time to get some rest. For now, you can find more pictures on my flickr page.

Follow up to Staircase Build Day Three Begins

Staircase Build Day Three Begins August 6, 2009 1 Comment

Before the third day of our project begins I wanted to quickly update with some photos. As it stands now the banister is mostly complete. Unfortunately, we dont have enough material to finish a few of the balusters. How did that happen?! Well, there are a number of reasons. The first being we based our measurements off of the neighbors, thinking they would be identical which they aren’t. Our newel post sits further into the room. The second being, we wanted to make our railing a little bit taller. It turns out the neighbors is 33″ tall which is way too low.

Today, we will finish we can can, plaster and start putting the place back together. Hopefully SF Victoriana will come through with the parts we ordered so we can get this thing complete but its too early to tell. More updates to follow. And as always, there are photos up on flickr

Follow up to Staircase Build Day Two

Staircase Build Day Two August 5, 2009 2 Comments

On day two of the build my father and I have made a great deal of progress. On day one we we finished clearing the debris and preparing the stringer, which holds the treads in place, for a piece of molding that all the balusters will be attached to. We also got the newel post in place which proved a little bit tricky.

Unfortunately the newel was not hollow like most box newels are. This one was completely solid, probably why it weighs 86 pounds. Luckily for us we have access underneath the floor via the garage so we could drive four lag bolts up through it.

On the beginning of day two we got the railing in place after fitting it multiple times. The old adage, “measure twice cut once” really comes into play here. The are some complicated angles involved, especially when the house is not perfectly square as it is 119 years old. Making a mistake on a 16 foot long railing that costs $300 dollars and weeks to make could set us back a lot of time.

So now, I must go back to work and stop writing blog posts on the Internet. There will be another update shortly, hopefully tonight. Now its time to put in all the balusters.

For more pictures please visit my Flickr page.

Follow up to Staircase Demolition Begins

Staircase Demolition Begins August 1, 2009 2 Comments

As I mentioned back in the post Rebuilding A Long Forgotten Staircase back in June, we’ve been gearing up to take down this old dividing wall and put a banister. Well this weekend my housemate and I got down to it.

It only took us a few hours to seal off all the rooms, lay down cardboard and tarp, and knock down all the lathe and plaster. Tomorrow we will cut down all the studs and clean up to prepare for the banister that is going up. My dad who is an expert woodworker is coming into town this Monday to help me build this thing, or should I say, teach me how to build it.

I will attempt to write a post every other day this week as the build progresses. Stay tuned here or on my Flickr page.

The Shop Gets New Toys And Organized July 6, 2009 No Comments

The only thing a shop needs more than tools is a place to put them. There is nothing more frustrating than working on a project and not being able to find your tools. Not only that, but you also need a place to clean them and yourself after a hard days work. That’s why with the projects pending and backing up I decided to organize to make them go smoother.

Last week I bought the big red Craftsman cabinet that you see in the picture above. Although it cost $250 dollars it was well worth it considering the amount of time it has already saved me. Putting it together was little more complicated than I would have liked but hey, its done now.

The other thing I invested in was a utility sink. Brian and I had gone way too long without having a place to clean our brushes and our hands when we are done working. Finally no more cleaning brushes in the house. Thanks again to our plumber Paul Stefas from Plumbing Solutions for always coming through when we need him.

All in all, these minor improvements make a huge difference in the shop. Its easier to find tools when you need them, there is more floor space, and we now have a place to clean up when we are finished. Next shop project, knock down a few walls to get more space. More on that in the coming months.

Rebuilding A Long Forgotten Staircase June 29, 2009 2 Comments

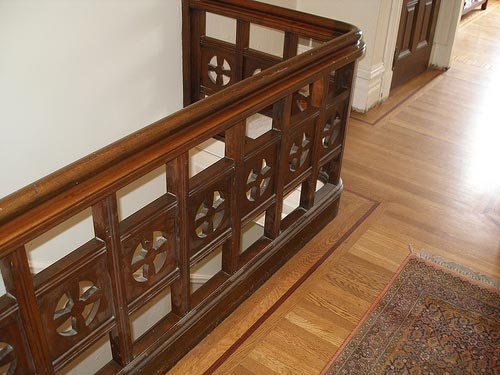
Victorian upstairs banister

Pictured above is our upstairs banister. This is original to the house just as it was for my four other neighbors. Our guess is that the architect of our houses was also building a church at the time judging by the crosses but we really just dont know. Although the banister you see above is in a good shape the lower banister had been removed decades ago.

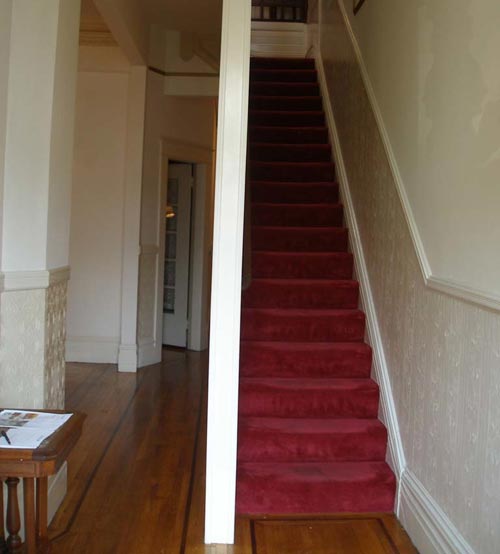
Since the house was split into two units at one point in its life a wall was put up between the upstairs and downstairs. We were hoping that inside the wall we would find ourselves a banister like our neighbors did but no such luck. Obviously whoever did the work on our house didnt have the foresight that the neighbors did. Anyway, we were only left with one choice; rebuild it ourselves. Below is a picture of the dividing wall that we are going to be knocking out.

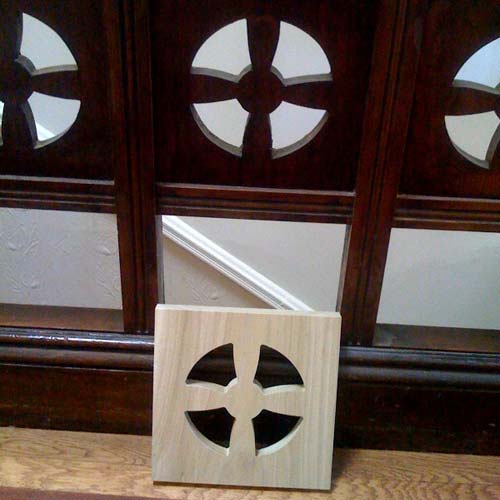
We enlisted the help of SF Victoriana to recreate the components off of what we already have. They have special knife setups to recreate any profile imaginable for railings, moldings, you name it. Pictured below is one of the 15 crosses they are making for us.

Victorian banister cross recreated

We will have more info to come as the project progresses. Right now we are in the gather and plan phase. Also, for more pictures of the staircase check them out on flickr.