Posts Tagged ‘Top Parlor’

Accent Lighting for Artwork March 25, 2010 1 Comment

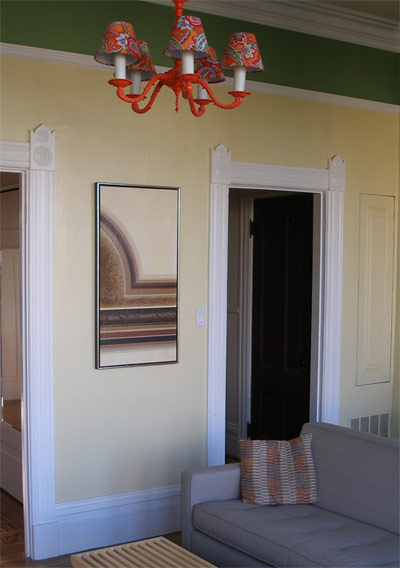
Halogen MR-16 eyeball lights on Weston Flax

This was one of the simplest projects we have tackled and made a pretty dramatic impact on the room. The room is much brighter and has a whole new sense of completeness that it was lacking before. Great bang for the buck. Also, since we had already updated most the electrical in the ceiling this project was complete in less than an hour.

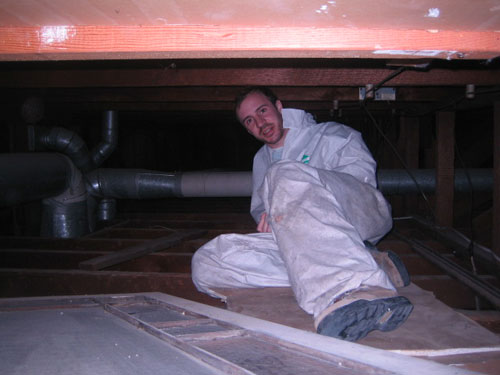
We started from inside the room and marked exactly where we wanted the lights to go. It helps to have a second set of hands to measure everything up perfect and square. Then after the positions were marked I put on the Tyvek suit and climbed up into the ceiling (thats what happens when you are the skinny one). From there Brian would use a RotoZip to cut out the holes and I would feed him the power. Then the lights are fed up from inside the room and snapped into place. Its that easy!


Thats me climbing in the ceiling

Fireplace Project Complete March 23, 2009 3 Comments

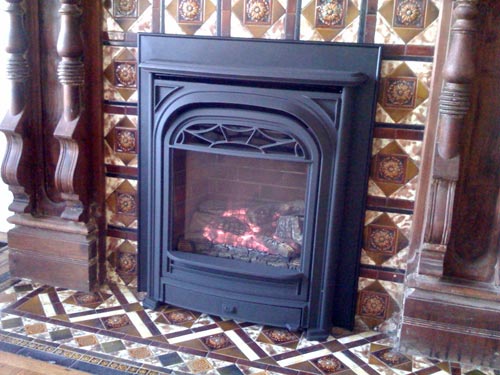
Victorian parlor fireplace

After a few weeks of dust, multiple different contractors, and some of our own elbow grease, the fireplaces are all done. I’d like to thank Joe from Warm Solutions and Paul Stefas from Plumbing Solutions for all their hard work. They all turned out great, look very period, and generate a lot of heat.

For those who are curious, the fireplaces are made by Valor. The two downstairs are pilotless systems that require no power to operate. The flame is ignited via battery. The remote on these can be set to sense the room temperature and adjust the flame accordingly. Very nice for energy savings by just heating one room. Perfect for a bedroom.

The one upstairs is your standard insert with a pilot light and a remote but if you have been following this project you’ll notice that the whole mantle is new as well. The old craftsman style brick was torn out and replaced with a more period Carrera marble unit.

Older posts regarding the fireplaces:

Great Vintage Painting Find March 10, 2009 No Comments

I found this great 70′s silk-screened type oil painting at The Other Shop down on Divisadero. I dont know what this room would be without this painting and I couldn’t be happier. Most things they sell are very pricey but some things like this piece were not. Even if you’re not out to buy its a great place to get ideas. Sometimes you can find similar things on eBay but other times its the little stores like this one that hide the greatest treasures.

Top Parlor Gets A New Fireplace March 6, 2009 5 Comments

The dust has hardly settled from the work that Joe and his crew from Warm Solutions did today but I had to re-assemble the room anyway. I have had this party planned for a while and there was no turning back. Luckily Joe made sure everything was in on time. The unfortunate part is, I have to take everything back out after the inspection so we can plaster and sand. At this point, we can assemble and disassemble this room in 20 mintues considering we’ve done it nearly 6 times already. I’m just glad to have my living room back even if its only for a few days.

Older posts regarding the fireplaces:

Install a Flat Panel TV with Hidden Wiring March 4, 2009 5 Comments

We all love the look of a nice sleek flat panel TV on the wall but no one likes the look of the wires just dangling there. Hiding them is actually quite simple it just takes a little thought a few tools. My job was little more complicated because I had to figure out how to keep them away from the chimney but the principal is the same anywhere. This is a great thing to try on your own as its a pretty simple job. Worse comes to worse, you pay someone to finish the job if you cant complete it yourself.

Really all you have to do is make holes around the studs so that you can pass wires over them. If your walls are lath and plaster like mine its a little hard to use an electronic stud finder but its still possible. I just knock and listen like the old timers do. Once I find the studs, I knock out rectangles over them so I can run my wiring there. I also like to notch out the studs and then put nail guards over them so a future owner wont put a picture frame nail through them. You could also drill through the studs but HDMI cable heads are kinda big, as well as all the other wires you gotta pass through there.
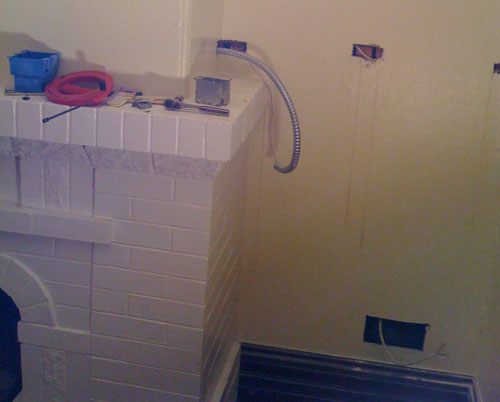
Make sure that you properly pin down the wires so that they dont get yanked out accidentally. You can use a nail guard like I did or staples. Just be sure not to crimp the wires! I would hate to have to do that twice. Now that the hard part is done, its time to get out the plaster and close up the holes that you made.

I also went the extra step and ran power to the TV so that I could use my power conditioner. I highly recommend using a nice conditioner like a Furman or Panamax to protect your equipment. Being paranoid and not liking to do things twice, I ran this power separately from the other video cables so as not introduce any interference. Again, I hate doing things twice.

Behind the TV I installed a two-gang junction box and a special flat panel TV box that is recessed to give you more room. I picked both of these things up at the Home Depot for a few dollars. Be sure to check out the back of your TV and decide where the box should go. Some places have more room than others and every TV is made differently.

Now if you want to get really fancy like I did, I installed nice wall plates behind my stereo setup for a professional finished look. You can easily just dangle them out from behind the drywall but who wants to do that? If you’ve come this far you may as well go the whole way.
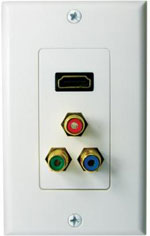
I picked up wall plates for my component video, HDMI, and speaker cable from hififorless.com, one of my favorite cheap equipment suppliers. They didnt cost much and the installation is self explanatory. When it said it done, it looks quite nice. To the right is the component video and HDMI plate I installed from SCP Wire company.

All in all, this is pretty simple task that the average do-it-yourselfer can handle. As I said before, its a great one to try for your first time as its simple to repair if you make a mistake. I would hate to throw away a few hundreds dollars when this job can easily be tackled. A flat panel TV costs enough, save your money!

For more picture visit this flickr set.

Make Your Own Chandlier November 22, 2008 No Comments

This was posted on my personal blog here and later on Apartment Therapy here.

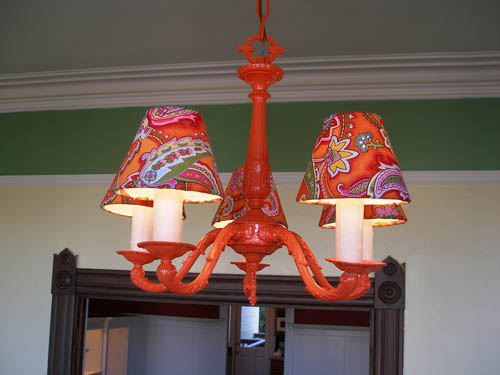
When my housemate and I moved into our new place we weren’t thrilled with the victorian-style knockoff chandelier that was in our living room. Our friend recommended we paint it and see if we still wanted to throw it out. So, I took the idea and ran with it. Needless to say, it’s definitely not getting thrown out any time soon. Here is a picture of the finished product.

DIY chandelier finished

This was a pretty simple project and started out with a beat up old chandelier. I took it down and cleaned it off as best I could with soap and water. Then I sprayed it with some white primer before hitting it with two coats of high gloss orange. That was the easy part and didnt take too long.

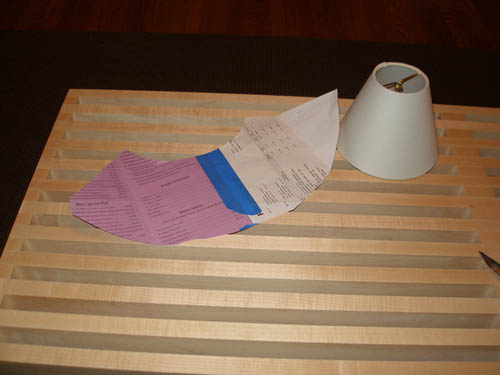
Next I had to track down some small lamp shade covers. I came across a nice set of 8 at lampsplus.com. First thing I did when I got them was template. This was crucial in cutting out 5 copies from the fabric. I simply wrapped a big enough piece of paper around the lamp shade and taped it. Then I trimmed up all the excess and unwrapped it. Voila template.

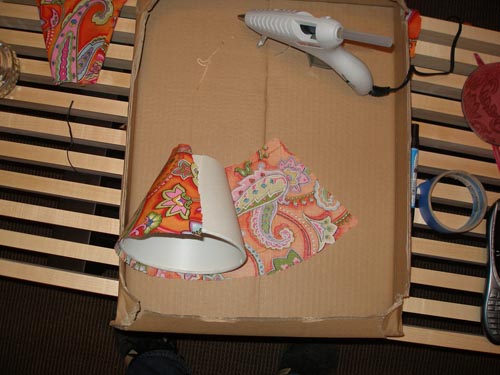
After all of the fabric was cut out it was time to warm up the glue gun. Make sure to try and line up the fabric seam with the seam thats already on the lamp shade. First I glued one side down where I wanted it, then I would take out all the slack and wrinkles and fold the over the other side. Dont worry about making this perfect. Once you fold over the top and button around the lamp shade rim you can deal with the rest of the slack.

Gluing the fabric on the DIY Chandelier

And thats it! There’s not much to it and it didnt take long. I was able to save an old chandelier from the dump and go something completely original in return. There are more pictures up on Flickr including one of the completed room.

Top Parlor Gets Color November 2, 2008 No Comments

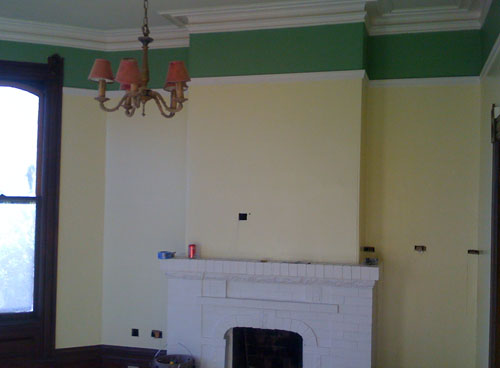
Although there is much more work to do on the top parlor, we have finally decided on color choices. I think it has turned out quite well, sans the brown molding. We chose Behr’s ‘Garden Path’ for the top portion and Benjamin Moore’s ‘Weston Flax’ for rest. A lot more updates are on the way including swatches, furniture, and painting the hideous brown colored molding. For now this will have to do. Oh yea, and don’t mind those holes either. That’s where we are wiring up our sound system and television.

To see all the pictures for this project click here.