Make Your Own Chandlier November 22, 2008
This was posted on my personal blog here and later on Apartment Therapy here.
When my housemate and I moved into our new place we weren’t thrilled with the victorian-style knockoff chandelier that was in our living room. Our friend recommended we paint it and see if we still wanted to throw it out. So, I took the idea and ran with it. Needless to say, it’s definitely not getting thrown out any time soon. Here is a picture of the finished product.
This was a pretty simple project and started out with a beat up old chandelier. I took it down and cleaned it off as best I could with soap and water. Then I sprayed it with some white primer before hitting it with two coats of high gloss orange. That was the easy part and didnt take too long.
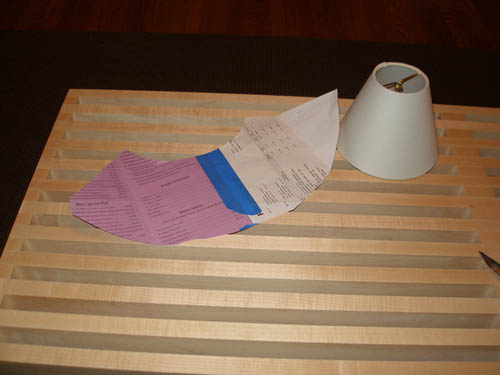
Next I had to track down some small lamp shade covers. I came across a nice set of 8 at lampsplus.com. First thing I did when I got them was template. This was crucial in cutting out 5 copies from the fabric. I simply wrapped a big enough piece of paper around the lamp shade and taped it. Then I trimmed up all the excess and unwrapped it. Voila template.
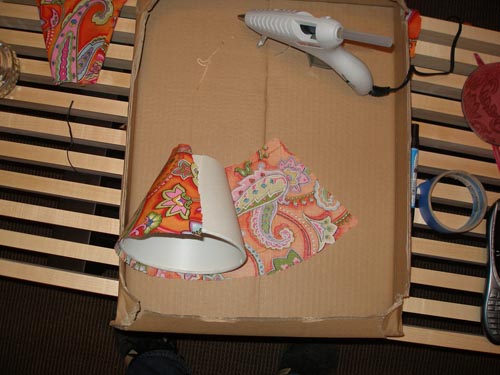
After all of the fabric was cut out it was time to warm up the glue gun. Make sure to try and line up the fabric seam with the seam thats already on the lamp shade. First I glued one side down where I wanted it, then I would take out all the slack and wrinkles and fold the over the other side. Dont worry about making this perfect. Once you fold over the top and button around the lamp shade rim you can deal with the rest of the slack.
And thats it! There’s not much to it and it didnt take long. I was able to save an old chandelier from the dump and go something completely original in return. There are more pictures up on Flickr including one of the completed room.


Leave a Reply