‘How To’ Archive

Hidden Library Projector Screen February 20, 2013 6 Comments

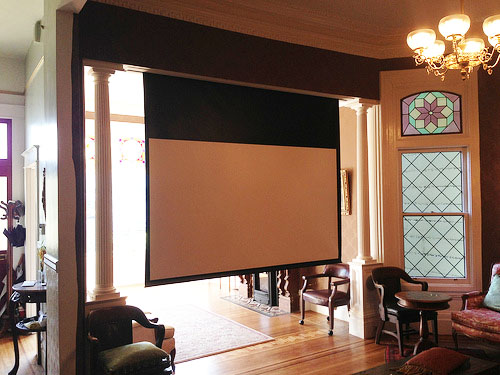
projector screen down

It’s been a lifelong dream of mine to have a home theater. The only problem is, who has space for an entire room dedicated to a home theater? Rather than create rooms with only one purpose, we build ours to entertain. This creates some really fun challenges. Above you can see the projector screen fully installed and lowered. I purchased the screen from Monoprice at a pretty good rate.

Below you can see what the room looks like with the screen retracted. Surprisingly, we’ve only had a few people notice it.

hidden library projector screen

But first, we had to knock down a wall before we began. This wall was put up sometime after the house was built and had a tiny french door. This created a cramped space with very little light. As you can see below, the room is beginning to open up.

taking down the wall for the projector screen

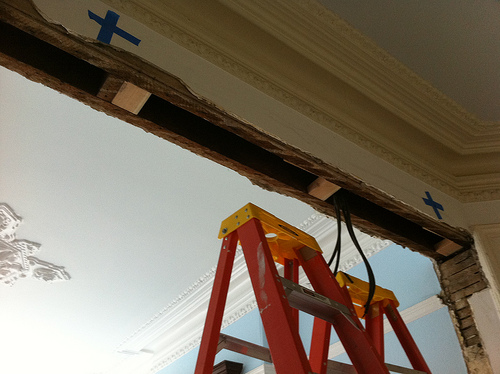
Once the wall was down we had to clean up the openings. We had wires running everywhere and even a few old gas pipes. After removing everything we built a soffit out of 2×4′s to house the screen and be bolted to the header.

preparing for the projector screen soffit

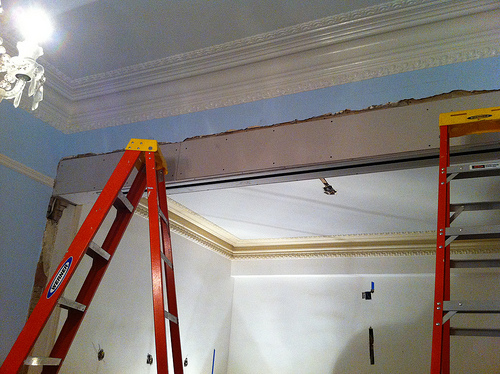
Once the soffit was done we screwed it to the opening and made sure it was level. We also test fitted the screen just to be sure that everything worked as planned. Then we took 1/4″ sheetrock and covered the soffit in preparation for plaster and wallpaper.

finishing up soffit for projector screen

Here’s a quick video of us testing the operation of the screen. Here you can also get a better look at the soffit.

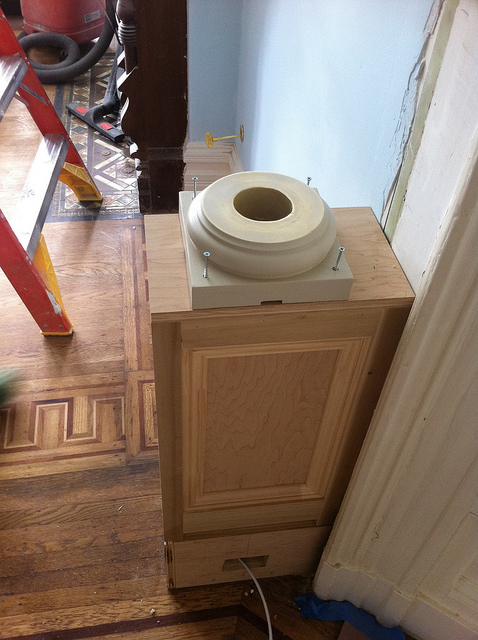
As we had prepared for, the original header that we screwed the soffit to was not level; however, the screen had to be in order to operate properly. We ended up creating boxes and columns on the sides of opening anyway, we just made one an inch taller than the other. The beautiful thing is that they are so far apart that no one notices. This is one of those visual tricks that you need to use when your house is 100+ years old.

column boxes for projector screen

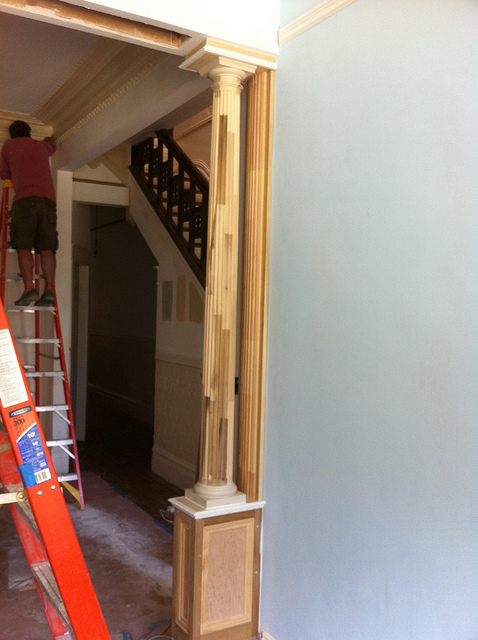
The columns are finger jointed poplar that I ordered from Pacific Columns. They came with proper instructions and were simple to put together. The hard pat for us was lining everything up with plumb bobs and measuring many times.

columns for projector screen installed

Voila! A small amount of work and a bunch of ingenuity made this a simple project. Not many people ever notice the screen and the columns really dress up the room and let in more light. Also, if you look closely at the photo below, you’ll see we built in speakers as well just to clear up floor space.

hidden project screen installed

If you’d like to see more photos of the build, check out the Projector Screen photo set on Flickr.
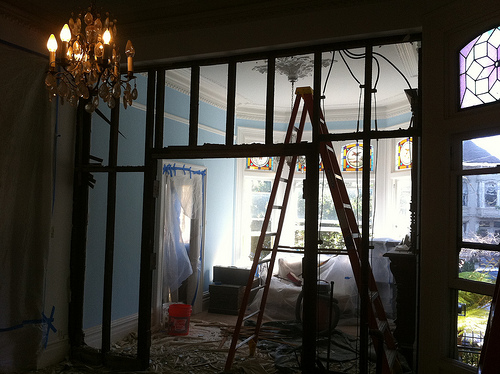
Working Toward A Milestone December 20, 2011 1 Comment

Setting milestones for projects is a highly effective motivator. I do this at my software startups, personal projects, and of course our house restoration. Figure out what motivates you to complete your projects and use that to help you accomplished your goals. For us, we use parties. We love having our friends over and sharing what we have built. We’ve been successfully running most of our big projects like this for years. We find that if we don’t have a goal to work toward its easy to drag your feet and find yourself saying, “I’ll get to it next weekend”.

Our most recent milestone was getting the house decorated for our annual Christmas party. We drape the house in icicle lights, poinsettias, and top it all off with an 11 foot tree. Then we invite over a hundred of our friends and enjoy the holidays together. Thanks to all who came to make it the best Christmas party we’ve ever had. It was such a great time that I’ll be even more motivated to do it again next year. Happy New Year!

Repairing Plaster Crown Molding November 1, 2011 2 Comments

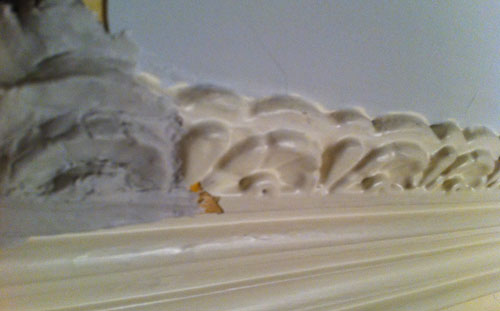
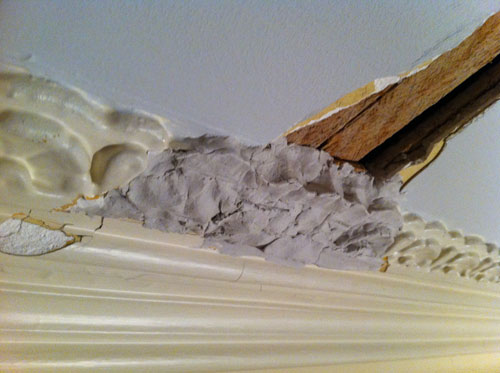
Recreating crown molding with clay

If you’re saying to yourself “that doesn’t look like plaster”, then you’re right. Its air dry clay that I bought from the art supply store. Long story short, while we were rewiring our overhead chandelier some of the molding got damaged. I opted for the do it yourself solution and called over my friend, neighbor, and founder of my company Adam Sah. In a past life he was a stone carver and his help was invaluable on this project.

We had two other options that we examined before tackling this project. The first involved calling in a expert. That we ruled that out because it was such a small job and seemed silly to waste the money. The second involved taking a cast of the undamaged molding and have it recreated in plaster. That too seemed like a waste considering how small of a section we needed.

This project was pretty straightforward, for me anyway. I sat back while Adam took about 20 minutes of his time to recreate the original to the best of his abilities. After a day of drying I filled in any irregularities with painters caulk and then primed it before paint.

Repairing Victorian Crown Molding

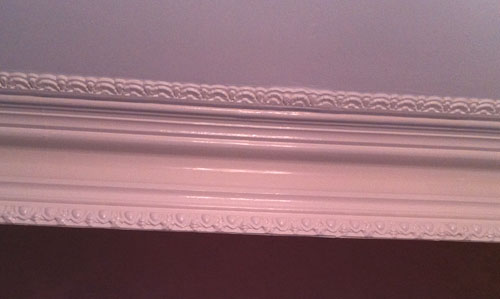
Below is a photo of everything complete. From the ground 12 feet below you can hardly even tell there was any work done. It only costed a few dollars and saved us a lot of effort as well. Often times I find it harder to manage a contractor than just doing it yourself, especially for a job of this size.

Victorian Molding Repaired

For more photos, see the repairing victorian crown molding photo set on Flickr.

Victorian Library Build Day Two August 20, 2011 1 Comment

Two Bookcases Complete

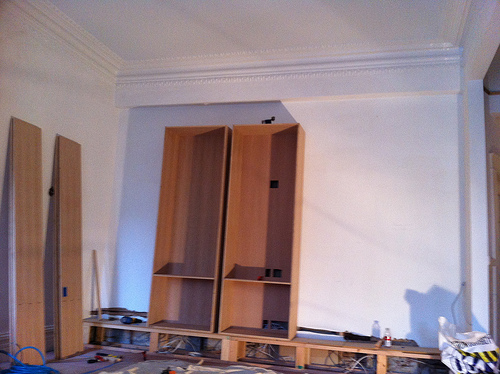
As day two comes to a close we have made a great deal of progress. As you can see from the photo above we have two bookcases fully assembled. The rest of the pieces are waiting for assembly tomorrow morning.

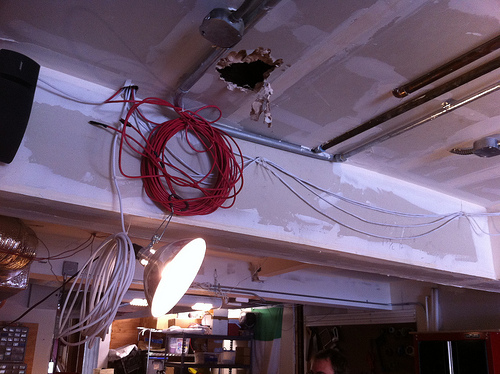
We also finished all the electrical and home theater wiring. Now is the time to plan ahead and make sure you have everything you need because once this is all sealed up its very hard to access. Luckily for us, this isn’t the first time we’ve wired a theater. We leave ‘chases’ for ourselves so we can fish more wires in and out as technology changes. We also ran two CAT6 cables in, just as we do for each room we work on.

Home Theater Wiring

For more photos visit the Victorian Library photo set on Flickr.

Victorian Library Build Day One August 19, 2011 No Comments

Victorian library bookcase bases

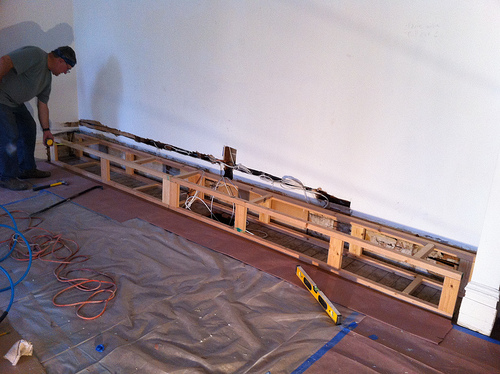
After a quick jaunt to SF Victoriana to pick up our milled parts we got to work this afternoon. We had to create a base to elevate the bookcases a foot off the floor. This will be covered by a nice oak baseboard that will have an HVAC vent as well as electrical outlets. The base is simply made from 2×4′s and a bunch of 2×4′s ripped in half. The top is simple 1/2″ MDF that we shimmed and leveled.

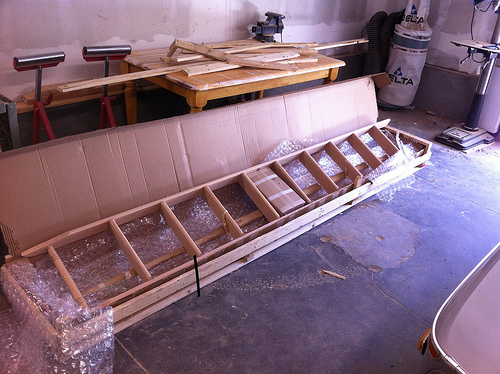
Below is a photo of the rolling ladder that we had shipped all the way from Putnam Ladders in Brooklyn, NY. They have been making ladders since 1905, 15 years after my house was built.

Victorian Rolling Ladder

For more photo’s visit the Victorian Library photo set on Flickr. Tomorrow we start the bookcases so stay tuned for more photos.

Install a Flat Panel TV with Hidden Wiring March 4, 2009 5 Comments

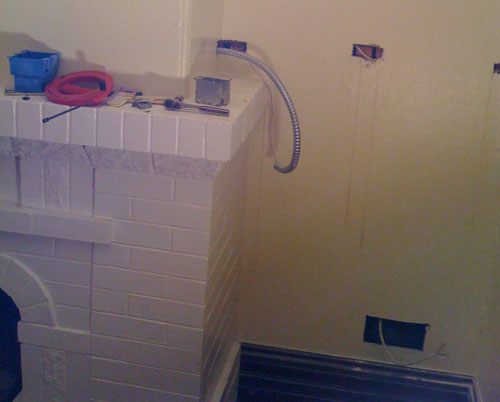
We all love the look of a nice sleek flat panel TV on the wall but no one likes the look of the wires just dangling there. Hiding them is actually quite simple it just takes a little thought a few tools. My job was little more complicated because I had to figure out how to keep them away from the chimney but the principal is the same anywhere. This is a great thing to try on your own as its a pretty simple job. Worse comes to worse, you pay someone to finish the job if you cant complete it yourself.

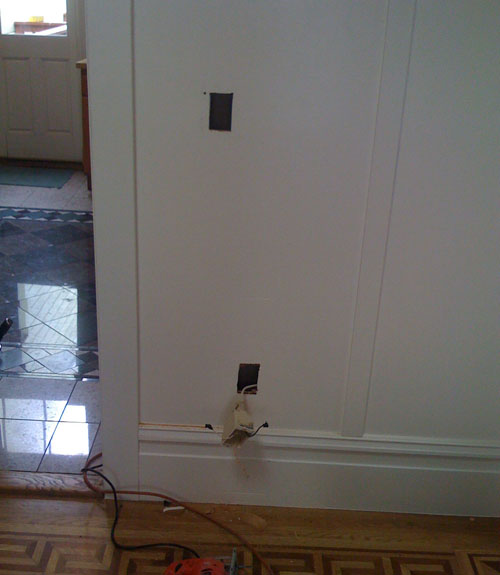
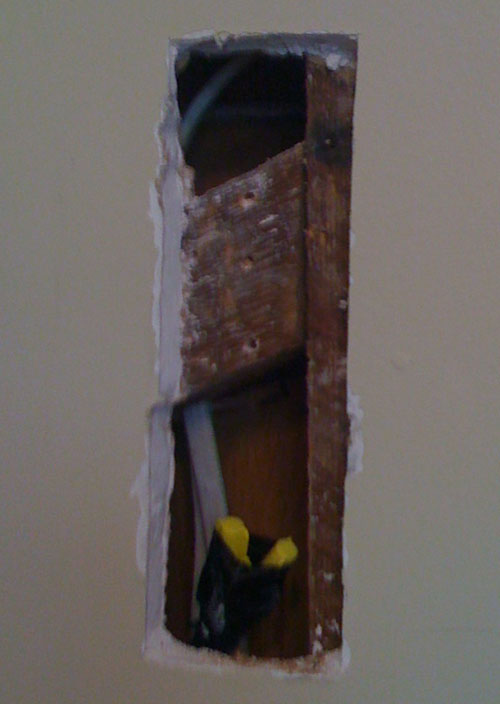
Really all you have to do is make holes around the studs so that you can pass wires over them. If your walls are lath and plaster like mine its a little hard to use an electronic stud finder but its still possible. I just knock and listen like the old timers do. Once I find the studs, I knock out rectangles over them so I can run my wiring there. I also like to notch out the studs and then put nail guards over them so a future owner wont put a picture frame nail through them. You could also drill through the studs but HDMI cable heads are kinda big, as well as all the other wires you gotta pass through there.

Make sure that you properly pin down the wires so that they dont get yanked out accidentally. You can use a nail guard like I did or staples. Just be sure not to crimp the wires! I would hate to have to do that twice. Now that the hard part is done, its time to get out the plaster and close up the holes that you made.

I also went the extra step and ran power to the TV so that I could use my power conditioner. I highly recommend using a nice conditioner like a Furman or Panamax to protect your equipment. Being paranoid and not liking to do things twice, I ran this power separately from the other video cables so as not introduce any interference. Again, I hate doing things twice.

Behind the TV I installed a two-gang junction box and a special flat panel TV box that is recessed to give you more room. I picked both of these things up at the Home Depot for a few dollars. Be sure to check out the back of your TV and decide where the box should go. Some places have more room than others and every TV is made differently.

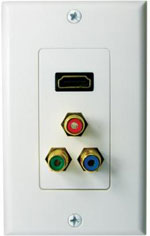
Now if you want to get really fancy like I did, I installed nice wall plates behind my stereo setup for a professional finished look. You can easily just dangle them out from behind the drywall but who wants to do that? If you’ve come this far you may as well go the whole way.

I picked up wall plates for my component video, HDMI, and speaker cable from hififorless.com, one of my favorite cheap equipment suppliers. They didnt cost much and the installation is self explanatory. When it said it done, it looks quite nice. To the right is the component video and HDMI plate I installed from SCP Wire company.
All in all, this is pretty simple task that the average do-it-yourselfer can handle. As I said before, its a great one to try for your first time as its simple to repair if you make a mistake. I would hate to throw away a few hundreds dollars when this job can easily be tackled. A flat panel TV costs enough, save your money!

For more picture visit this flickr set.

Replacing Old Knob and Tube Wiring February 23, 2009 3 Comments

Horrible splice job in some old knob and tube wiring

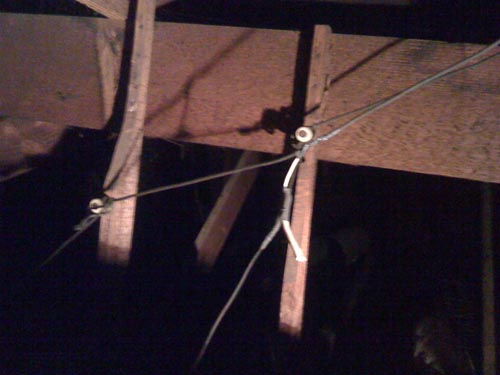
If your house is over 50 years old like mine is, chances are you have knob and tube wiring somewhere. Although its pretty cool to look at it and a marvel of its time, its outdated, annoying to work with, and most importantly ungrounded. Many electricians will tell you to leave it and I would agree; however, my home automation needs updated wiring to work. So, we began the daunting task of deprecating old wiring on a case by case basis.

Luckily, I have crawlspace access above the second story which is our main living space. That being said, its tight an cramped, not too mention 12 feet up through a skylight. Not the easiest thing to get into. When I got up there though, I was surprised at the cleanliness of it all. No animal remains at all and everything appeared to be in good order, except for the wiring! Yikes! It had been hacked and spliced over the years to the point where some of it was unsafe. As you can see from the picture above, I found new romex wiring spliced into knob and tube wiring that was abandoned. So I began the process of cutting out the old wiring and replacing it with the new. We still have some left but I like to think its a little safer now.

Wiring is actually quite simple and there’s really not much to know. The trick is, check your work and try to minimize the damage you make existing walls. Lets take the picture you see below as an example:

For some reason, the dining room had no chandelier. Luckily, I had clean grounded power in an outlet by the door from when the kitchen was redone. So, I made a hole in the plywood above the outlet for the new light switch. I was going to simply run a wire from the outlet to the switch into the ceiling but of course, this being an old house, there was crossblocking everywhere. Normally I would just find the block and open up a hole there to pass the wire through but this was all finished wood, not plaster. Instead, I opted to go through the kitchen and make holes there up to the ceiling rather than ruin all the finished work.

In the picture below you can see how I ran the new wiring through the blocking. I made the hole slightly larger than it had to be for a number of reasons. The first is to get a long bit in there to drill through the blocking. You can also chisel out a piece of the blocking and run the wire through that but just be sure to cover it with a nail guard so someone doesn’t try and put a picture hanger through it at a later date. The second reason for the bigger hole is so that I have something to support the new piece of drywall that I will have to put in there.

More photos can be found here.

Make Your Own Chandlier November 22, 2008 No Comments

This was posted on my personal blog here and later on Apartment Therapy here.

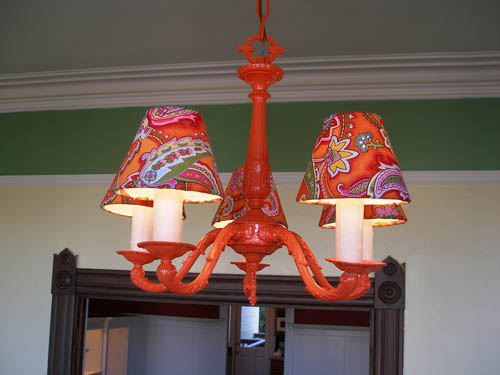
When my housemate and I moved into our new place we weren’t thrilled with the victorian-style knockoff chandelier that was in our living room. Our friend recommended we paint it and see if we still wanted to throw it out. So, I took the idea and ran with it. Needless to say, it’s definitely not getting thrown out any time soon. Here is a picture of the finished product.

DIY chandelier finished

This was a pretty simple project and started out with a beat up old chandelier. I took it down and cleaned it off as best I could with soap and water. Then I sprayed it with some white primer before hitting it with two coats of high gloss orange. That was the easy part and didnt take too long.

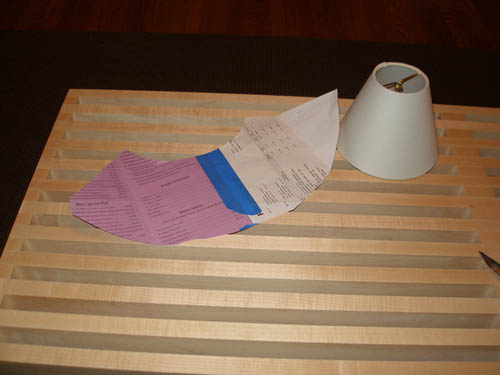
Next I had to track down some small lamp shade covers. I came across a nice set of 8 at lampsplus.com. First thing I did when I got them was template. This was crucial in cutting out 5 copies from the fabric. I simply wrapped a big enough piece of paper around the lamp shade and taped it. Then I trimmed up all the excess and unwrapped it. Voila template.

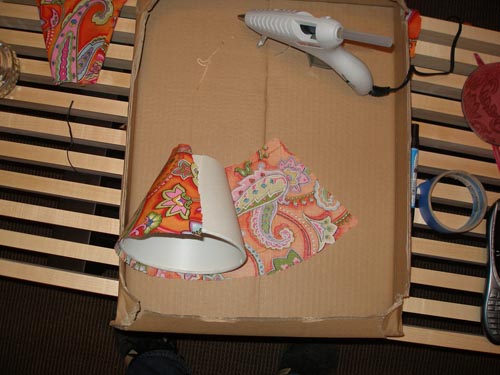
After all of the fabric was cut out it was time to warm up the glue gun. Make sure to try and line up the fabric seam with the seam thats already on the lamp shade. First I glued one side down where I wanted it, then I would take out all the slack and wrinkles and fold the over the other side. Dont worry about making this perfect. Once you fold over the top and button around the lamp shade rim you can deal with the rest of the slack.

Gluing the fabric on the DIY Chandelier

And thats it! There’s not much to it and it didnt take long. I was able to save an old chandelier from the dump and go something completely original in return. There are more pictures up on Flickr including one of the completed room.