Replacing Old Knob and Tube Wiring February 23, 2009
If your house is over 50 years old like mine is, chances are you have knob and tube wiring somewhere. Although its pretty cool to look at it and a marvel of its time, its outdated, annoying to work with, and most importantly ungrounded. Many electricians will tell you to leave it and I would agree; however, my home automation needs updated wiring to work. So, we began the daunting task of deprecating old wiring on a case by case basis.
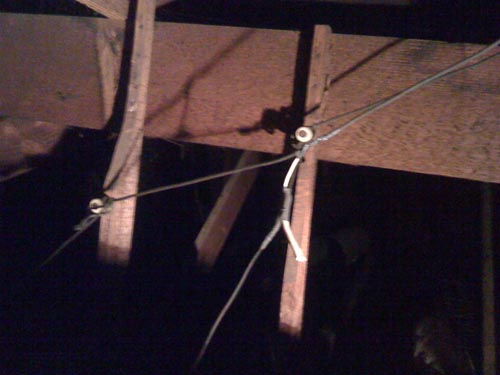
Luckily, I have crawlspace access above the second story which is our main living space. That being said, its tight an cramped, not too mention 12 feet up through a skylight. Not the easiest thing to get into. When I got up there though, I was surprised at the cleanliness of it all. No animal remains at all and everything appeared to be in good order, except for the wiring! Yikes! It had been hacked and spliced over the years to the point where some of it was unsafe. As you can see from the picture above, I found new romex wiring spliced into knob and tube wiring that was abandoned. So I began the process of cutting out the old wiring and replacing it with the new. We still have some left but I like to think its a little safer now.
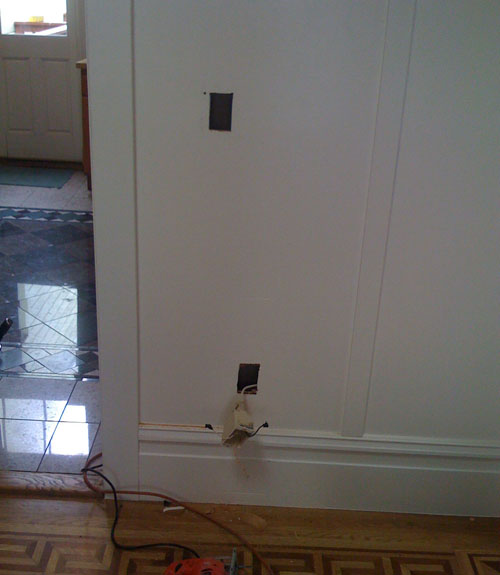
Wiring is actually quite simple and there’s really not much to know. The trick is, check your work and try to minimize the damage you make existing walls. Lets take the picture you see below as an example:
For some reason, the dining room had no chandelier. Luckily, I had clean grounded power in an outlet by the door from when the kitchen was redone. So, I made a hole in the plywood above the outlet for the new light switch. I was going to simply run a wire from the outlet to the switch into the ceiling but of course, this being an old house, there was crossblocking everywhere. Normally I would just find the block and open up a hole there to pass the wire through but this was all finished wood, not plaster. Instead, I opted to go through the kitchen and make holes there up to the ceiling rather than ruin all the finished work.
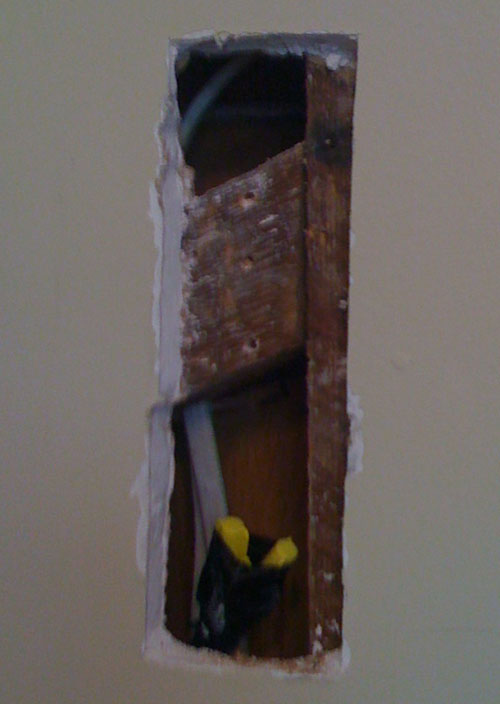
In the picture below you can see how I ran the new wiring through the blocking. I made the hole slightly larger than it had to be for a number of reasons. The first is to get a long bit in there to drill through the blocking. You can also chisel out a piece of the blocking and run the wire through that but just be sure to cover it with a nail guard so someone doesn’t try and put a picture hanger through it at a later date. The second reason for the bigger hole is so that I have something to support the new piece of drywall that I will have to put in there.

More photos can be found here.


[...] How-To instructions for various projects such as installing a flat panel TV with hidden wiring, and replacing old knob and tube wiring (can you believe it?! I toldja these places are [...]
1.) Great Sites to Bookmark…
2.) [...]here are some links to sites that we link to because they are definitely worth visiting[...]…
Hi admin, i must say you have hi quality articles here.
Your blog should go viral. You need initial traffic only.
How to get it? Search for; Mertiso’s tips go viral