Front Stairs and Restored Facade February 12, 2021 1

Since purchasing the house in 2008, its always been on the list to restore the old staircase to its original grandeur. Although we don’t have any photos of the house from the 1890′s, we have some great examples in the neighborhood that have many of the same artistic detail and styles. With the help of Centoni Restoration we were able to come up with an original looking design made with the same craftsmanship that was used back then.
All of the work was hand done and meticulously fitted and refitted over and over again until it was perfect. The new stairs were built from the ground up with a solid new foundation, pressure treated lumber, African mahogany stirs, and redwood detail and balustrades. These stairs are now bomb proof, look beautiful, and will last another hundred years.

But the project didn’t end with just the staircase. While we were at it we decided to widen the driveway, replace the concrete with cobblestone, and replace the front door and stained glass with something original.


All in all, I couldn’t be happier with the way that it turned out. It was a very long project which was further delayed by the pandemic but well worth the time and planning. Without Gina Centoni and her crew this never would have gone so smoothly nor looked this beautiful.
Hidden Library Projector Screen February 20, 2013 6

It’s been a lifelong dream of mine to have a home theater. The only problem is, who has space for an entire room dedicated to a home theater? Rather than create rooms with only one purpose, we build ours to entertain. This creates some really fun challenges. Above you can see the projector screen fully installed and lowered. I purchased the screen from Monoprice at a pretty good rate.
Below you can see what the room looks like with the screen retracted. Surprisingly, we’ve only had a few people notice it.

But first, we had to knock down a wall before we began. This wall was put up sometime after the house was built and had a tiny french door. This created a cramped space with very little light. As you can see below, the room is beginning to open up.

Once the wall was down we had to clean up the openings. We had wires running everywhere and even a few old gas pipes. After removing everything we built a soffit out of 2×4′s to house the screen and be bolted to the header.

Once the soffit was done we screwed it to the opening and made sure it was level. We also test fitted the screen just to be sure that everything worked as planned. Then we took 1/4″ sheetrock and covered the soffit in preparation for plaster and wallpaper.

Here’s a quick video of us testing the operation of the screen. Here you can also get a better look at the soffit.
As we had prepared for, the original header that we screwed the soffit to was not level; however, the screen had to be in order to operate properly. We ended up creating boxes and columns on the sides of opening anyway, we just made one an inch taller than the other. The beautiful thing is that they are so far apart that no one notices. This is one of those visual tricks that you need to use when your house is 100+ years old.

The columns are finger jointed poplar that I ordered from Pacific Columns. They came with proper instructions and were simple to put together. The hard pat for us was lining everything up with plumb bobs and measuring many times.

Voila! A small amount of work and a bunch of ingenuity made this a simple project. Not many people ever notice the screen and the columns really dress up the room and let in more light. Also, if you look closely at the photo below, you’ll see we built in speakers as well just to clear up floor space.

If you’d like to see more photos of the build, check out the Projector Screen photo set on Flickr.
Dining Room Hutch Finished October 7, 2012 2

Four years ago we started the dinning room project but it wasn’t until recently that we finally installed the glass shelving. We went with glass because it allows the light to illuminate everything and not just the top shelf. The lighting is standard 12v AC lighting ‘pucks’ you can get at any Home Depot, Target, or Bed Bath and Beyond. The shelves were about $200 dollars in total and are a 1/4″ thick.
Below you can see the adjustable shelving holes. We own a jig for this purpose, but you can easily make one yourself or just measure twice and drill once.

This is a very simple project and any do-it-yourselfer can tackle it. One piece of advice, use wood to make a template for the glass cutter rather than cardboard. Its easier for you to test fitment and its a better for them to cut from.
For more photos of this project and others, check out the dinning room photo set on Flickr.
Custom Double Hung Window Replacement July 19, 2012 12
If your home is anywhere near as old as mine you know that windows are the biggest factor in energy loss. In the summer they let in heat and too much UV light and in the winter they let out heat and in cold air. The easiest way to remedy the problem is to have custom windows and sashes made from someone like Marvin, Anderson, or Pella which means the old weights are being removed as well as the old sash. This isn’t very traditional and does change the look drastically on both the inside and the outside of the house.
Instead of changing the look I found another custom solution that blended the best of both worlds. The Wood Window Warehouse in Emeryville, CA specializes in making old style windows with modern technology. They use traditional joinery and old style methods of creating double hung weighted windows with two panes of gas filled with gas with a low-e coating to keep out UV light. They also add weather stripping all around for nice tight fit.
Below is a photo of the windows removed.

Below you can see a close up of one of the new windows. We attached our original hardware and you can barely tell the difference. The craftsmanship is superb and the room is already feeling less drafty. It is also protecting our beautiful damask wallpaper from fading.

While we were having the windows replaced in the front parlor we also decided to have a leaded glass window made for the library. The view out the window looks down the tradesmen entrance so translucent glass was a perfect choice to mask the ugly view. The leaded glass also plays nicely on the original leaded stained glass above and helps to complete this part of the library.

All in all the project was as easy as picking up the phone and ordering. Unfortunately these windows don’t come cheap but its the price you have to pay to keep the house traditional.
Mid-Century Backyard Project Complete March 13, 2012 7

After four weeks the project has finally come to a close. Adam Wooley and his crew did an incredible job and the finished project looks spectacular. The finishing touches and attention to detail really show in the finished product. I’d highly recommend them to anyone serious about craftsmanship.

Below you can see a closeup of some of the textures and plant life. We decided to go with a white rock in the long planter bed to give a nice contrast and add yet another color. The plants in the foreground are mondo grasses and the ones in the back are a type of horsetail. All the way in the back you can also get a look at the copper accent ‘uplights’ that we chose. Lighting is very important and having indirect lighting is paramount to achieve the look we are after.

The other planter bed, pictured below, has a lighter color of pebble to match the vertical veneer around the yard and give contrast to the white pebble in the long bed. We also chose a tree fern and other grasses for this area much like the planter in the front of the house.


Below you can see how the yard meets the existing structures. We have vines growing currently which we hope to cover the stairs and other areas that we plan to hide.

In conclusion, a project like this can be very expensive but very rewarding. Stones like these, especially the blue slate patio, are not cheap. The same is true for the Ipe wood but what you are paying for is quality and a style that cannot be mimicked with other materials. This timeless design and functional space will give us joy for years to come.
Backyard Nearing Completion February 19, 2012 2

Well the project is running a little behind schedule but these things happen. We’re designing details on the fly and have packed a lot into this little space. As you can the blue slate patio is almost in but is a painstaking process as they are running diagonally which means lots of 45 degree cuts. We wanted to break up the squareness of the space and I think this definitely accomplishes that goal. Below you can see there is still a ways to go.

Below you can see the LED lights we installed from Elemental LED which are based right over the bridge in Emeryville. They were very helpful and ended up buying about 20 feet of their Warm White Waterproof LED strips. We still may need to put a filter over them to warm the color a bit but we’ll wait until the project is finished to make the final call.

Stone and Pergola Work Continue February 10, 2012 0
We’re about two weeks into the backyard project and nearing the home stretch. Adam Wooley and his team are making quick work of the job. As you can see, the benches are going in as well as the stone veneer. The pergola should also be done this week.

Here you can really get a better picture of what everything will look like. The space has really transformed and its starting to feel like an outdoor room. Next up, we are sourcing the LED under-bench lighting as well as planning for the horticulture.

More updates to follow next week. To watch the build live follow the progress on the mid-century backyard photo set.
Backyard Foundation Completed January 31, 2012 0
Its only day four here on the project and Adam, Sean, Jorge, and Fidel from Wooley Landscapes have made a huge dent the in workload. Their attention to detail and pride in this project is something you’ll only find in an owner operated business like this one. We’re flushing out ideas on the fly and adapting to the landscape which feels very organic. This is also how we like to do things so it’s a great fit.
 Above you can see the PVC being laid that will carry the 240v needed to power our IR heatlamp. I’ll provide more info on that once we get closer to that step. Below you can see the foundation and first row of blocking. There is also low voltage light wiring as well as draining holes in the concrete.

More photos to follow tomorrow as the progress continues but here’s a sneak peek of some of the materials that have just arrived. To the right you can see the thick blue slate pavers right next the redwood that used for the pergola. In the back of the photo are the long Ipe clapboards that will be used for the walls and the benches.

Breaking Ground on the Backyard January 26, 2012 3
After three years and a few false starts we have finally gotten around to focusing on the backyard. We have had many ideas over the past few years but it wasn’t until we hired Adam Wooley and his crew that we came up with an idea that represents the house and our eclectic style. The theme is mid-centrury modern and inspired by the Eames’ with clean lines, sharp angles, and lots of mood lighting.
Below you can see the preliminary design. A few things have changed since then but you’ll just have to wait to see the finished product.

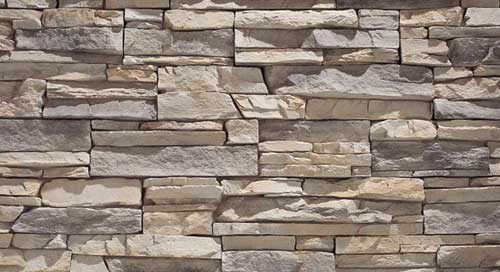
The slate patio is made of blue slate measuring 2′x3′ at 2″ thick. We decided to run them diagonally to break up the square nature of the backyard. The stone walls around the back are at differing heights to give visual interest and are going to be wrapped in a stacked slate veneer like the one you see below.
The fences on both sides will be getting wrapped in very long horizontal Ipe clapboards which will provide a clean look. The two benches you can see in the diagram are also made of Ipe and will appear to be floating as there will be no posts supporting them. This in conjuction with lighting underneath will give them the effect of being weightless and will make the space feel bigger. There will also be a pergola with heat lamps over part of the yard but more on that later. I’ll be updating with more photos in a few days.
For the time being, here is what the yard looks like. They are getting ready to pour the footing for the walls and benches.

Working Toward A Milestone December 20, 2011 1

Setting milestones for projects is a highly effective motivator. I do this at my software startups, personal projects, and of course our house restoration. Figure out what motivates you to complete your projects and use that to help you accomplished your goals. For us, we use parties. We love having our friends over and sharing what we have built. We’ve been successfully running most of our big projects like this for years. We find that if we don’t have a goal to work toward its easy to drag your feet and find yourself saying, “I’ll get to it next weekend”.
Our most recent milestone was getting the house decorated for our annual Christmas party. We drape the house in icicle lights, poinsettias, and top it all off with an 11 foot tree. Then we invite over a hundred of our friends and enjoy the holidays together. Thanks to all who came to make it the best Christmas party we’ve ever had. It was such a great time that I’ll be even more motivated to do it again next year. Happy New Year!