Repairing Plaster Crown Molding November 1, 2011
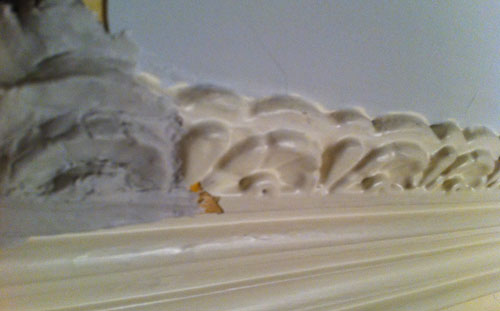
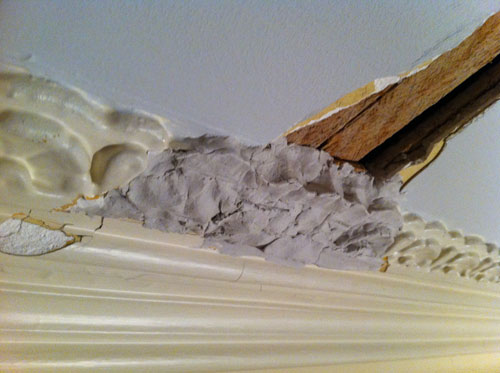
If you’re saying to yourself “that doesn’t look like plaster”, then you’re right. Its air dry clay that I bought from the art supply store. Long story short, while we were rewiring our overhead chandelier some of the molding got damaged. I opted for the do it yourself solution and called over my friend, neighbor, and founder of my company Adam Sah. In a past life he was a stone carver and his help was invaluable on this project.
We had two other options that we examined before tackling this project. The first involved calling in a expert. That we ruled that out because it was such a small job and seemed silly to waste the money. The second involved taking a cast of the undamaged molding and have it recreated in plaster. That too seemed like a waste considering how small of a section we needed.
This project was pretty straightforward, for me anyway. I sat back while Adam took about 20 minutes of his time to recreate the original to the best of his abilities. After a day of drying I filled in any irregularities with painters caulk and then primed it before paint.
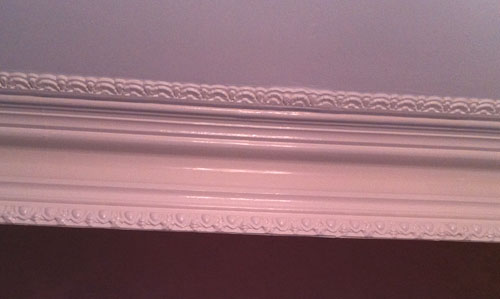
Below is a photo of everything complete. From the ground 12 feet below you can hardly even tell there was any work done. It only costed a few dollars and saved us a lot of effort as well. Often times I find it harder to manage a contractor than just doing it yourself, especially for a job of this size.
For more photos, see the repairing victorian crown molding photo set on Flickr.


nice photo of the finish!
There were a few key requirements to this project: the original was also done by hand and therefore had variation, it’s an abstract design and not (e.g.) a person’s face (i.e. the human eye can spot tiny flaws) andit’s on a 12-foot high ceiling, so it’s far away from the eye. I wouldn’t necessarily have tried this on a one-of-a-kind statue of a person at eye level.
note: the project actually takes ~5 minutes or less if you’re doing this in more favorable conditions– not on the ceiling, not someone else’s house, not while people are taking photos, and not the first time you’re doing something like this!!
finally, an important detail: make sure to push some clay around/behind the surrounding areas (ideally, through the lathe) — this holds it in place and protects against settling and vibration, the latter of which we’ve had quite a bit the past week in SF!!
adam
I admire your spirit. I used acrylic paint to repair my wallpaper so I think your (okay Adam’s) solution was terrific.