Updating the Craftsman Dining Room October 28, 2008
When we moved in, we immediately started figuring out our order operations; what was most important to us. It turned out to be a nice living area, a place to eat, and a kitchen. That being said, our kitchen was done, we had a temporary living room downstairs, so it was off to the dining room. My housemate loves to cook and I love to entertain so the dining room seemed to be a logical choice.
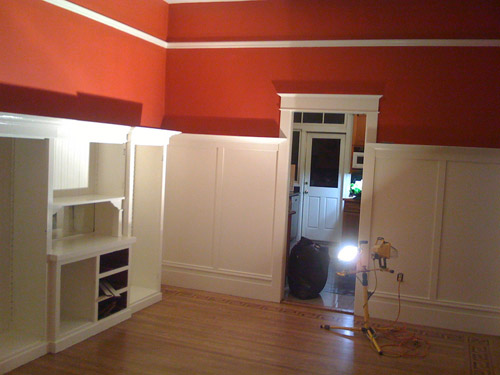
What a choice that turned out to be! At first glance, we thought we may keep the wood as is, just sand and refinish. Upon further inspection, the wood was cheap plywood and it had been glazed over numerous times. Even if we wanted to refinish it, that cheap plywood would still show through. So, we decided to paint.
After days and days of sanding and scraping off the old glaze it was finally time for a primer. We went with an oil based primer to bond with the oil based glaze that we had scuffed and sanded to create mechanical bond. That in itself was a daunting task. The stuff goes on thick but it was worth it. After a thick coat of primer applied a latex final coat of white. Well, three coats to be exact. We really wanted a deep rich white and that’s what it takes. Many many coats.
The same holds true for the wall color that we chose. It is Behr’s “Old Flame”. It came out beautifully but took numerous coats. If out anyone knows anything about painting red it can be a royal pain. If you’re going to embark on this journey, don’t lie to yourself. It will take a minimum of three coats end of story. Brace yourself. In our case, it took four! But as you can from the results, its totally worth it.


I have been wandering thru your wonderful home looking for the kitchen and butler’s pantry. Could you please point me in that direction?
and closets. I like closets and attics.