Rebuilding A Long Forgotten Staircase June 29, 2009 2
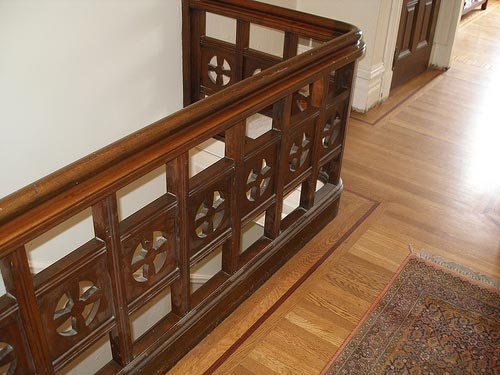
Pictured above is our upstairs banister. This is original to the house just as it was for my four other neighbors. Our guess is that the architect of our houses was also building a church at the time judging by the crosses but we really just dont know. Although the banister you see above is in a good shape the lower banister had been removed decades ago.
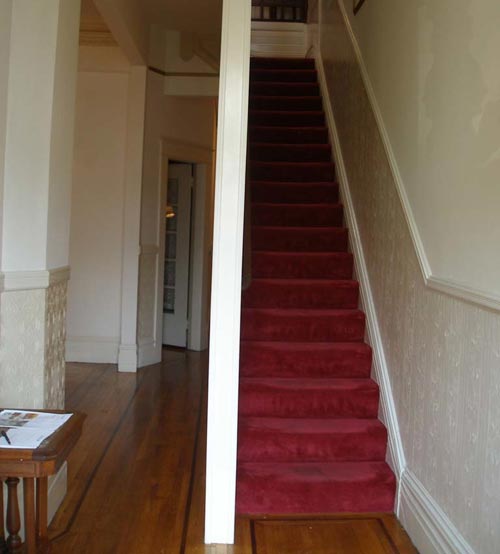
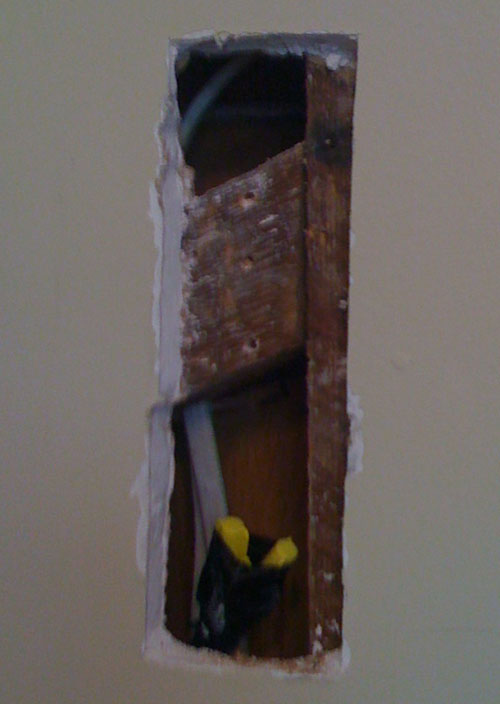
Since the house was split into two units at one point in its life a wall was put up between the upstairs and downstairs. We were hoping that inside the wall we would find ourselves a banister like our neighbors did but no such luck. Obviously whoever did the work on our house didnt have the foresight that the neighbors did. Anyway, we were only left with one choice; rebuild it ourselves. Below is a picture of the dividing wall that we are going to be knocking out.
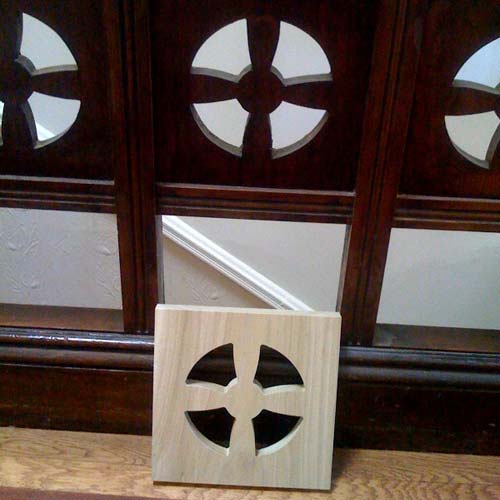
We enlisted the help of SF Victoriana to recreate the components off of what we already have. They have special knife setups to recreate any profile imaginable for railings, moldings, you name it. Pictured below is one of the 15 crosses they are making for us.
We will have more info to come as the project progresses. Right now we are in the gather and plan phase. Also, for more pictures of the staircase check them out on flickr.
Create A Lightbox In A Skylight May 13, 2009 2
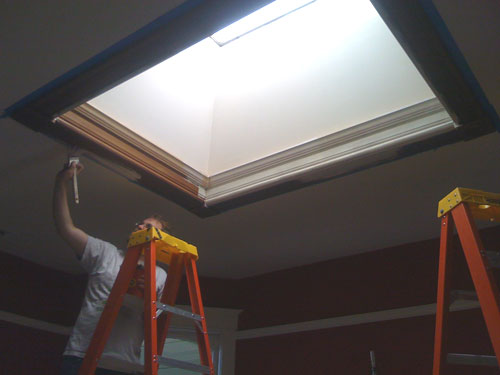
A simple way to add drama to a room is to add some indirect accent lighting. We had held off on painting the skylight box just for this reason. Once the wiring was all done, it was time to buy some rope light and crown molding.
The goal is to add another layer of molding in the skylight box and hide the rope light behind that, providing and indirect glow from the skylight. This project is really quite simple and the only tricky part is getting the crown molding just right. Most miter saws actually have the proper angles and dimensions written on them. If not, there are plenty of videos and how-to’s on the web.
Really, there’s not much more to it than cutting four pieces of molding, adding a rope light, some paint, and voila! Instant depth and drama to an otherwise boring part of the room. All in all, the project only takes a few hours, minus dry times between paint.
Fireplace Project Complete March 23, 2009 3
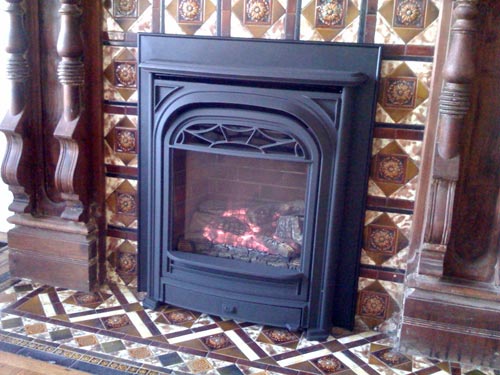
After a few weeks of dust, multiple different contractors, and some of our own elbow grease, the fireplaces are all done. I’d like to thank Joe from Warm Solutions and Paul Stefas from Plumbing Solutions for all their hard work. They all turned out great, look very period, and generate a lot of heat.
For those who are curious, the fireplaces are made by Valor. The two downstairs are pilotless systems that require no power to operate. The flame is ignited via battery. The remote on these can be set to sense the room temperature and adjust the flame accordingly. Very nice for energy savings by just heating one room. Perfect for a bedroom.
The one upstairs is your standard insert with a pilot light and a remote but if you have been following this project you’ll notice that the whole mantle is new as well. The old craftsman style brick was torn out and replaced with a more period Carrera marble unit.
Older posts regarding the fireplaces:
Great Vintage Painting Find March 10, 2009 0
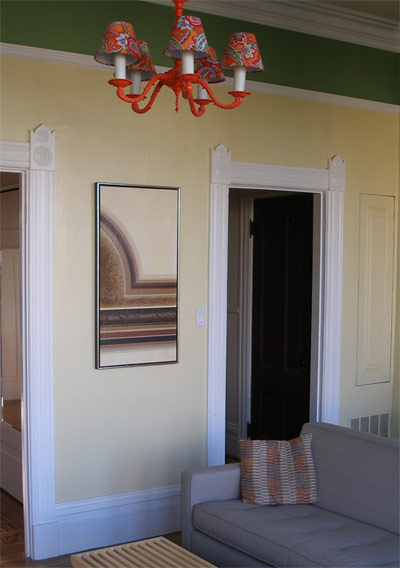
I found this great 70′s silk-screened type oil painting at The Other Shop down on Divisadero. I dont know what this room would be without this painting and I couldn’t be happier. Most things they sell are very pricey but some things like this piece were not. Even if you’re not out to buy its a great place to get ideas. Sometimes you can find similar things on eBay but other times its the little stores like this one that hide the greatest treasures.
Top Parlor Gets A New Fireplace March 6, 2009 5
The dust has hardly settled from the work that Joe and his crew from Warm Solutions did today but I had to re-assemble the room anyway. I have had this party planned for a while and there was no turning back. Luckily Joe made sure everything was in on time. The unfortunate part is, I have to take everything back out after the inspection so we can plaster and sand. At this point, we can assemble and disassemble this room in 20 mintues considering we’ve done it nearly 6 times already. I’m just glad to have my living room back even if its only for a few days.
Older posts regarding the fireplaces:
Wiring For High Speed Ethernet March 5, 2009 1
Lets face it, wireless just isn’t going to cut it for a large house with many computers and devices on it. I still to this day have friends asking me why hardwire anymore? Some of them adamantly oppose my preference for copper for reasons unbeknownst to me. Being a software engineer and avid geek I have a great deal of experience with enterprise systems. Although all companies structure their data centers differently there is one thing they all have in common, copper. In order to hit high speeds reliably you must have a direct connection the switch or router. A house with many devices is no different.
Here is a perfect example of why I am hard wiring as many things as I can, leaving the wireless to just the peripherals. My housemate and I stream music wirelessly to other rooms from one central machine. The music is stored on the network via NAS (network attached storage). When we are playing music from our main iTunes machine, the music must be pulled from the NAS via wifi to the machine, then back out to the wireless access point, then out to its final destination. That is a lot of network hops over the airwaves! Now start adding other devices like iPhones or laptops and your music starts skipping and some devices start getting kicked off the network. The problem multiplies when you are streaming video from room to room and doing multiple things at one time. Its an all around bad scene and an annoyance. Enter gigabit ethernet via Cat 6!
Switching to this system we have permanently eliminated this issue, creating speeds that are literally 10 times faster than even 802.11n. In my experience, N is not that fast and progressively gets worse the farther you travel from your access point. Then add 10 other hungry devices on the same access point and your out of luck. Reliability is gone. Hardwiring as many devices as you can frees up your WiFi for the devices that actually need them, PDA’s and laptops.
So, now I have hopefully explained myself enough, onto the actual work! I am not going to give a tutorial on how to run wires, just point out a few tips and tricks I encountered along the way. First and foremost, run more wires than you need! You never know what the future holds and how technology is going to change. Now a days you can run everything from video to home phone over Ethernet cable.
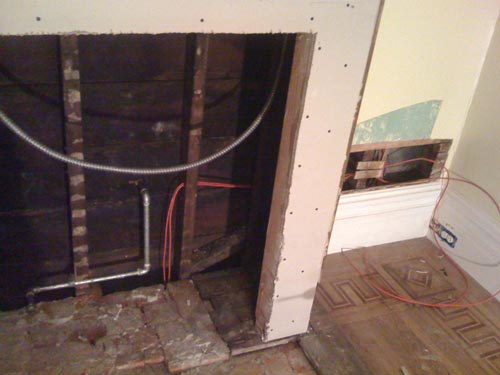
Second, and almost as important as the first, any open wall is an opportunity! Case in point, the new fireplaces that are being installed gave me ample room to run two new pieces of Cat 6 to the living room.
In other cases, I have also run cabling outside along with the coax cable for television. That being said, Ethernet cable does not like the sun and will crack over time. Water should be okay but time will tell. At least its not buried in a wall that I will never want to open again.
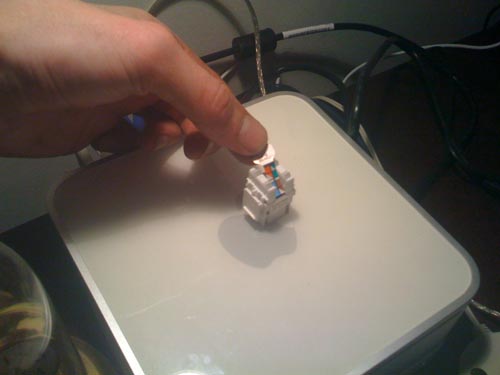
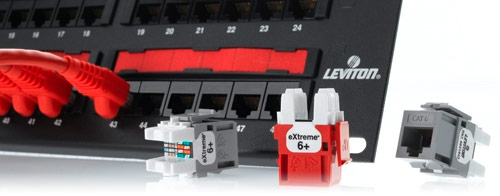
To make the installation look neat and professional go down to the Home Depot and get yourself some nice wall plates and Ethernet jacks from Leviton. They aren’t too expensive and give a nice finished look. They are also easy to install and directions come with every port, along with a little tool that helps you punch the wires down tight. One thing the directions don’t tell you is which wiring schema to use! This confused more for a second there until I realized on the back of the port you could peel off the T568B wiring layout to reveal the T568A layout. See the picture below.
Other than that there were really no surprises. The job went quite quickly and the results were immediate. My favorite type of results! Our network is blazingly fast, more reliable, and our access point seems to be happier and faster because of it. Thank you good old copper!
Install a Flat Panel TV with Hidden Wiring March 4, 2009 5
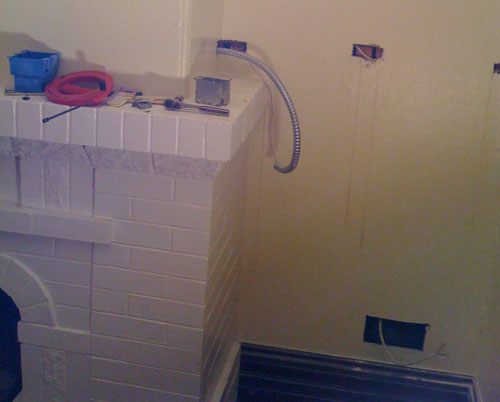
We all love the look of a nice sleek flat panel TV on the wall but no one likes the look of the wires just dangling there. Hiding them is actually quite simple it just takes a little thought a few tools. My job was little more complicated because I had to figure out how to keep them away from the chimney but the principal is the same anywhere. This is a great thing to try on your own as its a pretty simple job. Worse comes to worse, you pay someone to finish the job if you cant complete it yourself.
Really all you have to do is make holes around the studs so that you can pass wires over them. If your walls are lath and plaster like mine its a little hard to use an electronic stud finder but its still possible. I just knock and listen like the old timers do. Once I find the studs, I knock out rectangles over them so I can run my wiring there. I also like to notch out the studs and then put nail guards over them so a future owner wont put a picture frame nail through them. You could also drill through the studs but HDMI cable heads are kinda big, as well as all the other wires you gotta pass through there.
Make sure that you properly pin down the wires so that they dont get yanked out accidentally. You can use a nail guard like I did or staples. Just be sure not to crimp the wires! I would hate to have to do that twice. Now that the hard part is done, its time to get out the plaster and close up the holes that you made.
I also went the extra step and ran power to the TV so that I could use my power conditioner. I highly recommend using a nice conditioner like a Furman or Panamax to protect your equipment. Being paranoid and not liking to do things twice, I ran this power separately from the other video cables so as not introduce any interference. Again, I hate doing things twice.
Behind the TV I installed a two-gang junction box and a special flat panel TV box that is recessed to give you more room. I picked both of these things up at the Home Depot for a few dollars. Be sure to check out the back of your TV and decide where the box should go. Some places have more room than others and every TV is made differently.
Now if you want to get really fancy like I did, I installed nice wall plates behind my stereo setup for a professional finished look. You can easily just dangle them out from behind the drywall but who wants to do that? If you’ve come this far you may as well go the whole way.
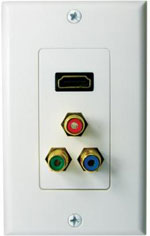 I picked up wall plates for my component video, HDMI, and speaker cable from hififorless.com, one of my favorite cheap equipment suppliers. They didnt cost much and the installation is self explanatory. When it said it done, it looks quite nice. To the right is the component video and HDMI plate I installed from SCP Wire company.
All in all, this is pretty simple task that the average do-it-yourselfer can handle. As I said before, its a great one to try for your first time as its simple to repair if you make a mistake. I would hate to throw away a few hundreds dollars when this job can easily be tackled. A flat panel TV costs enough, save your money!
For more picture visit this flickr set.
Gas Inserts for the Old Fireplaces February 27, 2009 7
Like many of the old houses I come across here in San Francisco, the fireplaces are non functional. This is due to a number of reasons. Lack of upkeep which leads to safety issues, bad landlords or past owners, or disinterest in dealing with San Francisco’s Spare the Air days. For those of you not in the know, if you have a wood burning fireplace and you use it during a Spare the Air day, you can get fined. This means you must turn on the news or go online to find if you can use your fireplace.
Anyway, when we moved into our place all three of the fireplaces were not working. We are still unsure of how original they are but when I find out I’ll provide updates. What I do know is that there was only one original fireplace as there is only one real brick chimney. At the time it burned coal. The other two, the top parlor and bottom parlor, were just framed in “bump outs” with vents in them. The strange thing is, the bottom parlor only had a vent and no gas line at all, but the top parlor had both.
The two wood mantle and tile fireplaces we are keeping as they are very old and are very fitting of the time period regardless of their originality to the house. Those are in the front parlor and guest room, which was at one point the dining room? The white one you see is a craftsman style brick that resides in the top parlor. That’s the one we demolished and are having replaced with a Carrera marble mantle and gas insert. They should be completed in the next few weeks and I’ll update as that happens.
Newer posts regarding the fireplaces:
Replacing Old Knob and Tube Wiring February 23, 2009 3
If your house is over 50 years old like mine is, chances are you have knob and tube wiring somewhere. Although its pretty cool to look at it and a marvel of its time, its outdated, annoying to work with, and most importantly ungrounded. Many electricians will tell you to leave it and I would agree; however, my home automation needs updated wiring to work. So, we began the daunting task of deprecating old wiring on a case by case basis.
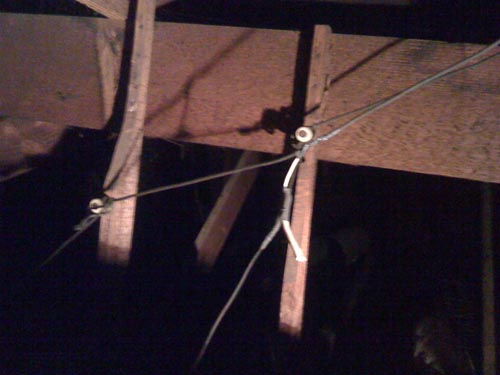
Luckily, I have crawlspace access above the second story which is our main living space. That being said, its tight an cramped, not too mention 12 feet up through a skylight. Not the easiest thing to get into. When I got up there though, I was surprised at the cleanliness of it all. No animal remains at all and everything appeared to be in good order, except for the wiring! Yikes! It had been hacked and spliced over the years to the point where some of it was unsafe. As you can see from the picture above, I found new romex wiring spliced into knob and tube wiring that was abandoned. So I began the process of cutting out the old wiring and replacing it with the new. We still have some left but I like to think its a little safer now.
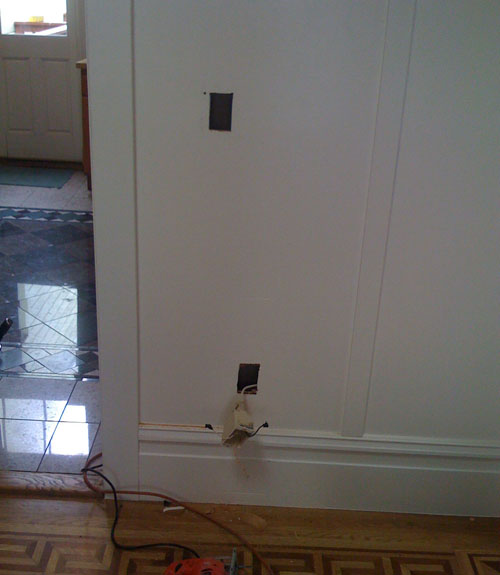
Wiring is actually quite simple and there’s really not much to know. The trick is, check your work and try to minimize the damage you make existing walls. Lets take the picture you see below as an example:
For some reason, the dining room had no chandelier. Luckily, I had clean grounded power in an outlet by the door from when the kitchen was redone. So, I made a hole in the plywood above the outlet for the new light switch. I was going to simply run a wire from the outlet to the switch into the ceiling but of course, this being an old house, there was crossblocking everywhere. Normally I would just find the block and open up a hole there to pass the wire through but this was all finished wood, not plaster. Instead, I opted to go through the kitchen and make holes there up to the ceiling rather than ruin all the finished work.
In the picture below you can see how I ran the new wiring through the blocking. I made the hole slightly larger than it had to be for a number of reasons. The first is to get a long bit in there to drill through the blocking. You can also chisel out a piece of the blocking and run the wire through that but just be sure to cover it with a nail guard so someone doesn’t try and put a picture hanger through it at a later date. The second reason for the bigger hole is so that I have something to support the new piece of drywall that I will have to put in there.
More photos can be found here.
Make Your Own Chandlier November 22, 2008 0
This was posted on my personal blog here and later on Apartment Therapy here.
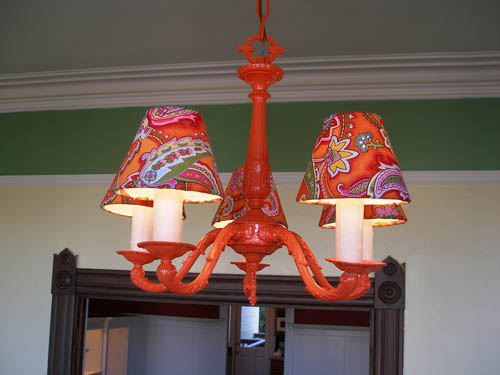
When my housemate and I moved into our new place we weren’t thrilled with the victorian-style knockoff chandelier that was in our living room. Our friend recommended we paint it and see if we still wanted to throw it out. So, I took the idea and ran with it. Needless to say, it’s definitely not getting thrown out any time soon. Here is a picture of the finished product.
This was a pretty simple project and started out with a beat up old chandelier. I took it down and cleaned it off as best I could with soap and water. Then I sprayed it with some white primer before hitting it with two coats of high gloss orange. That was the easy part and didnt take too long.
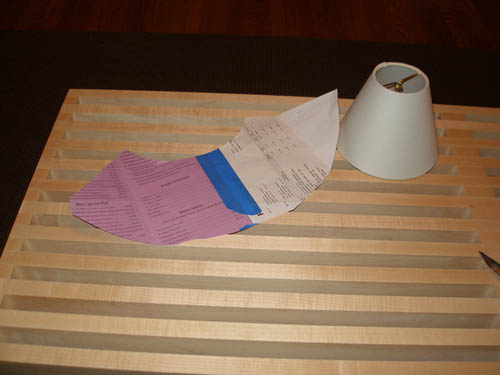
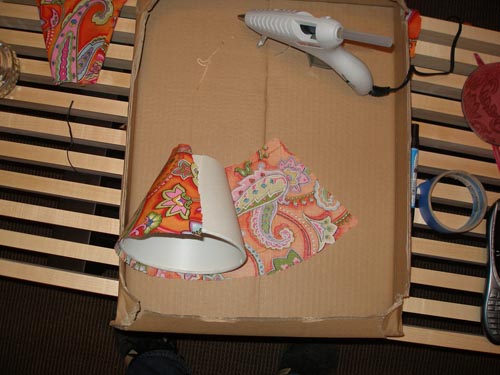
Next I had to track down some small lamp shade covers. I came across a nice set of 8 at lampsplus.com. First thing I did when I got them was template. This was crucial in cutting out 5 copies from the fabric. I simply wrapped a big enough piece of paper around the lamp shade and taped it. Then I trimmed up all the excess and unwrapped it. Voila template.
After all of the fabric was cut out it was time to warm up the glue gun. Make sure to try and line up the fabric seam with the seam thats already on the lamp shade. First I glued one side down where I wanted it, then I would take out all the slack and wrinkles and fold the over the other side. Dont worry about making this perfect. Once you fold over the top and button around the lamp shade rim you can deal with the rest of the slack.
And thats it! There’s not much to it and it didnt take long. I was able to save an old chandelier from the dump and go something completely original in return. There are more pictures up on Flickr including one of the completed room.
